
How to Send Email Notifications When Releasing a Sales Order in Business Central
In Microsoft Dynamics 365 Business Central, the release of the Sales Order is a key control step — it indicates that an order is ready for subsequent processing, like picking, shipping, or invoicing.
But in most organizations, it’s beneficial to automatically notify certain users or departments when a Sales Order is released.
For instance:
- The warehouse staff might need to begin preparing the shipment.
- The finance team might prefer to watch for released orders for credit limits.
- Or a sales manager might prefer to see approvals and order flow in real time.
Luckily, with some minimal AL customization, we can send an automatic email notification whenever a Sales Order is released.
Processing model.
This integration ensures accurate data capture, faster processing, and centralized storage for reporting and downstream Cloudflows.
In this blog, we will take you through:
- How to configure email accounts in Business Central.
- How to develop a basic AL codeunit that triggers and sends the email notification.
- Screenshot step-by-step examples.

Step by Step Explaination
Step 1: Set Up Email in Business Central
You need to set up your email account before Business Central is able to send any email.
- In the Tell Me search field, enter “setup email” and click Set Up Email.

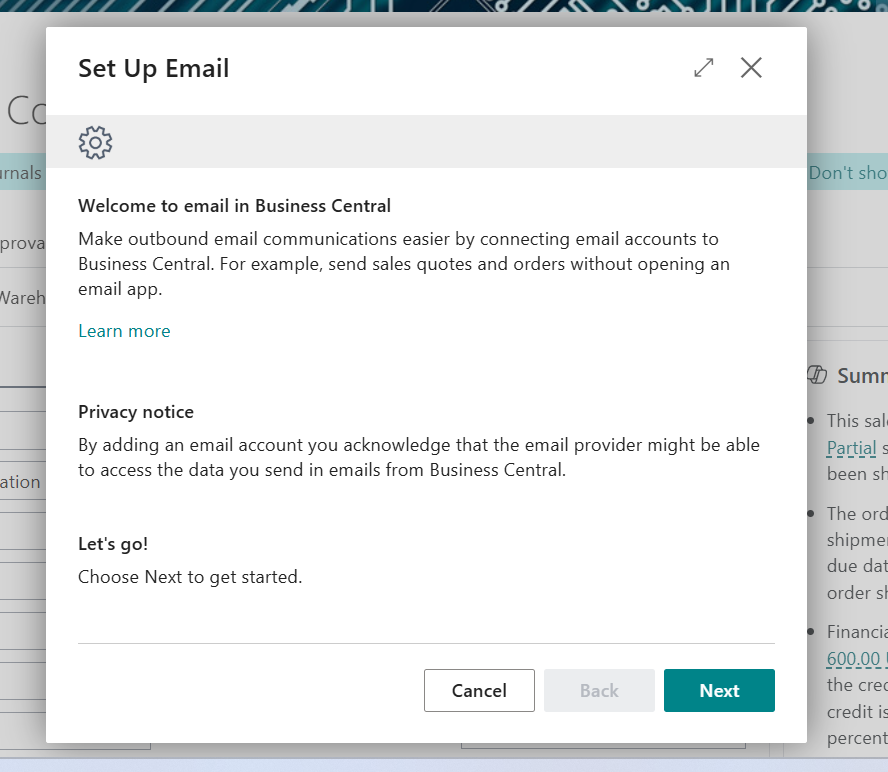
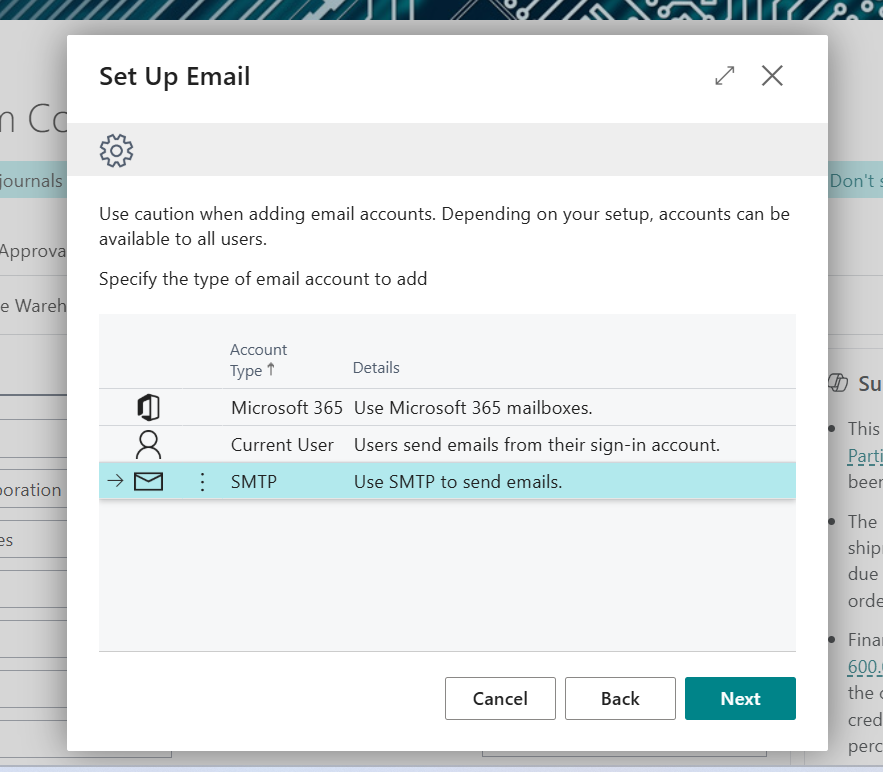
- In the Set Up Email wizard, you will be prompted to select the account type. You can utilize one of the following:
- Microsoft 365 – Suggested if you utilize Exchange Online or Outlook 365.
- Current User – Utilizes the signed-in user’s Microsoft 365 account.
- SMTP – For typical SMTP mail servers (e.g., Gmail, corporate mail relay).
- Next, fill in the required information (such as SMTP server, port, sender address, and authentication), and finish the setup.


Step 2: Create a Codeunit to Send Email on Sales Order Release
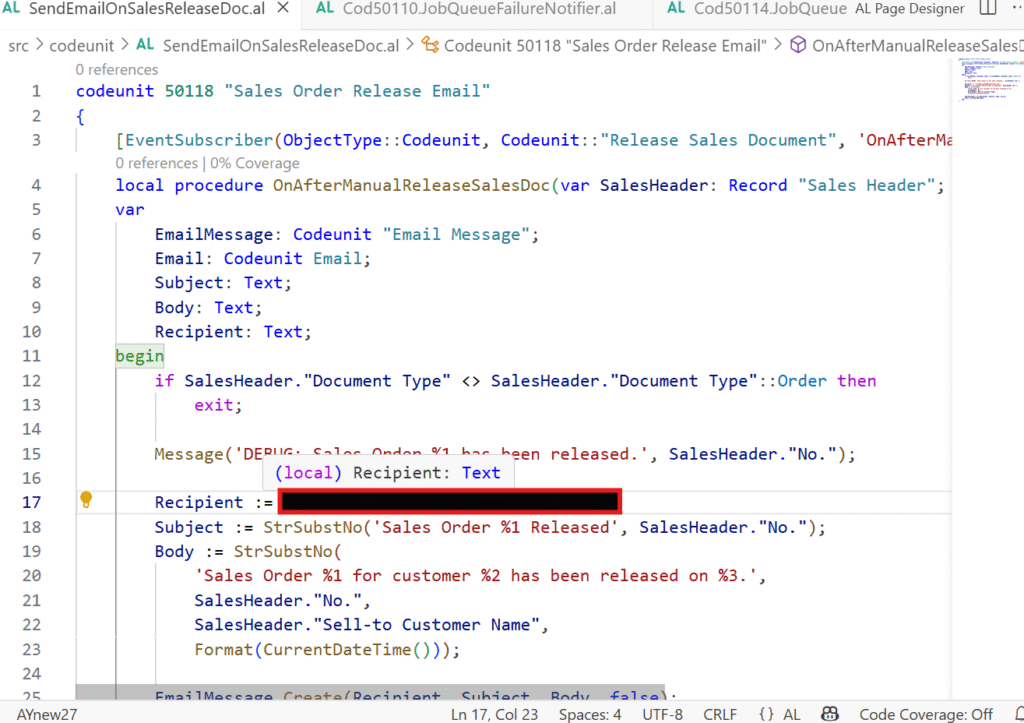
Now that the email setup is ready, we’ll create a new AL code unit that listens for the Sales Order release event and sends an email.
- Open Visual Studio Code connected to your Business Central environment.
- Create a new file, for example:
SendEmailOnSalesReleaseDoc.al
- Add the following code:
Step 3: Deploy and Test
- Publish your extension to your sandbox using Visual Studio Code (Ctrl + F5).
- In Business Central, go to any Sales Order and click Release.
- Look into the mailbox of the recipient you set up — you should get an email like this:
Subject: Sales Order 102001 Released
Body: Sales Order 102001 for customer Alpine Ski House was released on 06/10/2025 11:25 AM.
More Enhancements
You can extend this logic further based on your business requirements:
- Send to various recipients depending on Salesperson, Location, or Customer Group.
- Save recipients in a custom setup table rather than hardcoding.
- Add additional order information like amount, shipping date, or payment terms.
- Send HTML email templates for improved formatting.
Outcome
For more details like this please follow our company LinkedIn page where you will get all the new updates
every week:
https://www.linkedin.com/company/allgrow-technologies-pvt-ltd/mycompany/
or you can write us at contact@allgrowtech.com
-By Abhishek Yadav
Author
Leave a comment
Your email address will not be published
DO YOU WANT TO TURN YOUR IDEA INTO REALITY
Services we offer
Software and Web Development
Consulting Services
Development
Frontend
Backend
DevOps
SAAS
Locate us at
INDIA
4th Floor, Bhavya Corporate Tower,
Vibhuti Khand, Gomti Nagar, Lucknow,
Uttar Pradesh, India 226010
Get in Touch
For Business – contact@allgrowtech.com
For Career – hr@allgrowtech.com
© 2026 ALLGROW TECHNOLOGIES. ALL RIGHTS RESERVED.