
Advantages of using Power Apps dataflows for Business Central:
- Automation
Schedulable refreshes keep Dataverse synced with Business Central so data updates happen without manual exports or handoffs.
- Reusability and Consistency
One dataflow supplies the same cleaned, modelled tables to multiple apps, flows, and reports, ensuring all consumers use identical data and logic. - Reduced App Complexity and Better Performance
Pre-shaped tables simplify app formulas and lookups, cut runtime processing, and improve responsiveness.
In this blog I am going to provide step by step guide to create a dataflow in Power App. The flow is designed to take data from Business Central to Dataverse (Power Apps). In this tutorial we will take customer table data from Business central and transfer all data to accounts table in the Power Apps.
For example:
- Source: Customer table in Business Central
- Destination: Account table in Dataverse (Power Apps)
- Goal: Transfer all Customer data into Account using a dataflow.
Steps for taking data of customer table of business central to account table of dataverse=>
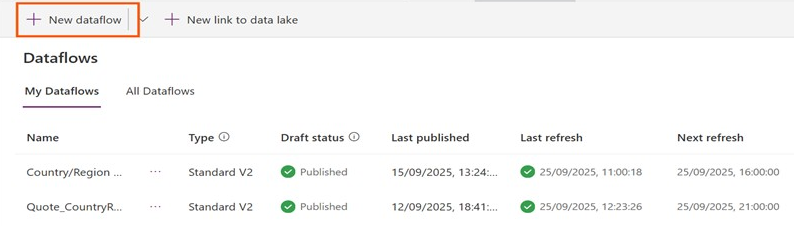
1.Click Dataflows to get into dataflows page.

2. Click “New dataflow”.
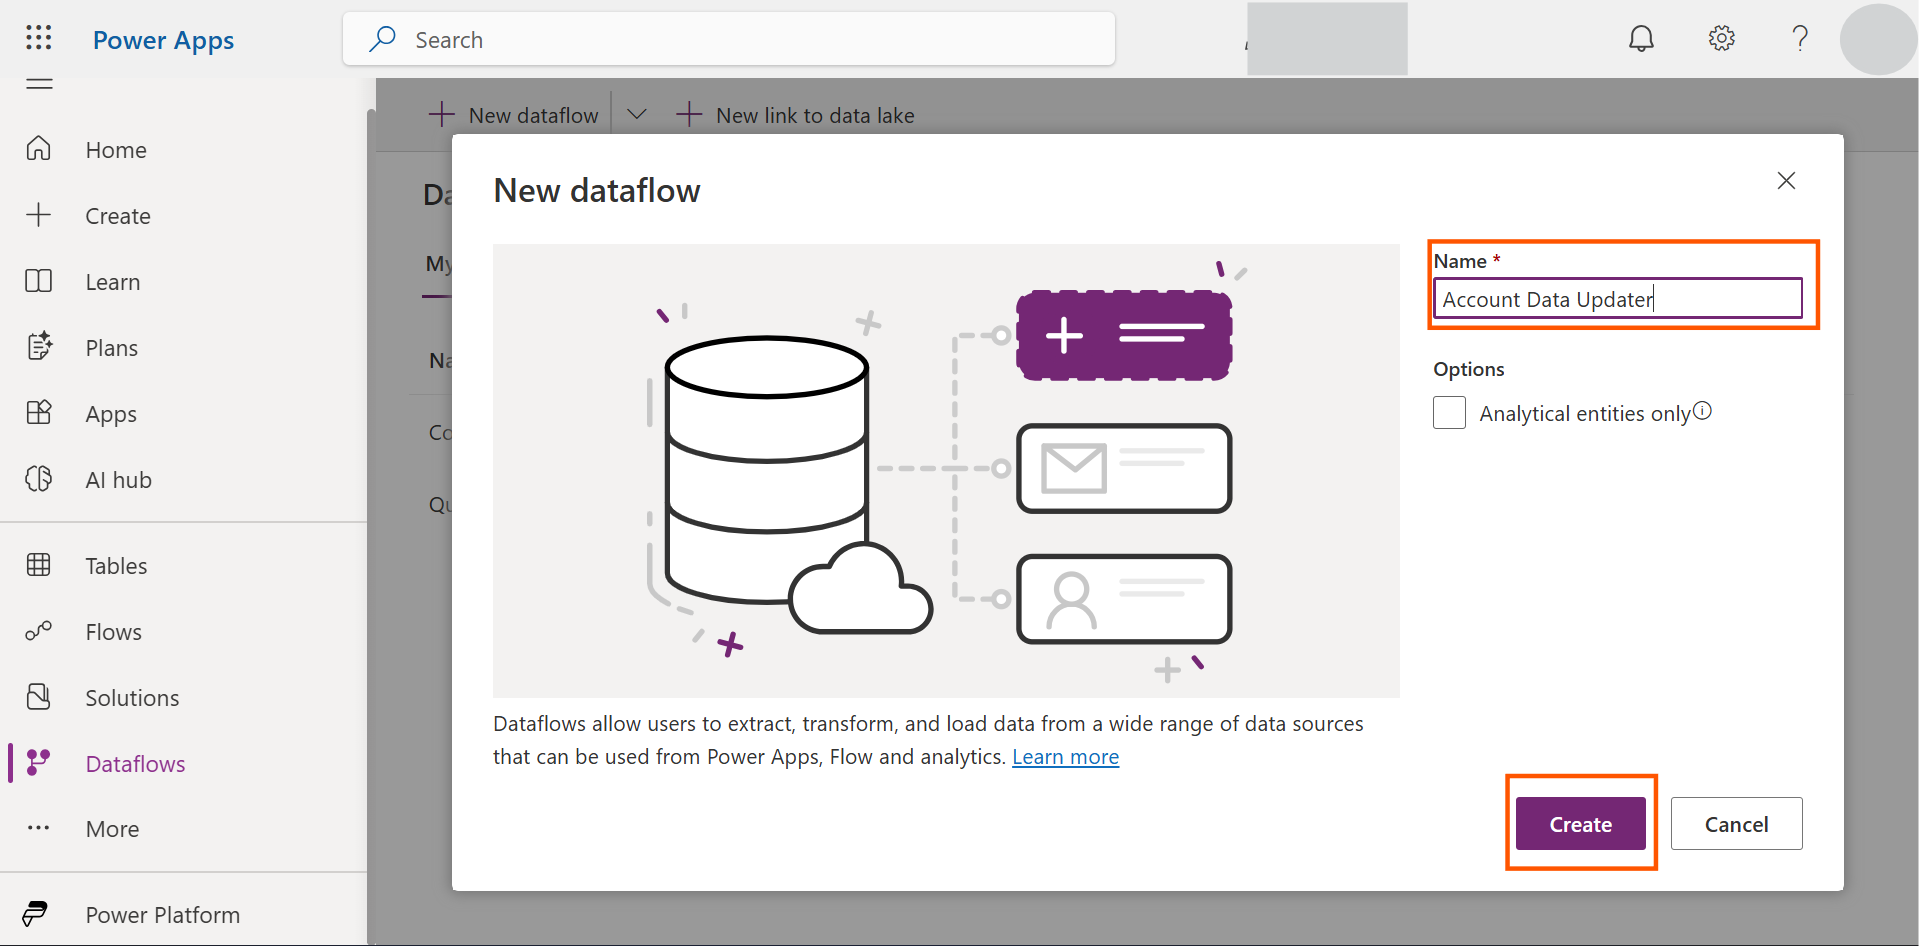
3.Give Dataflow name of your Choice, then click “Create”
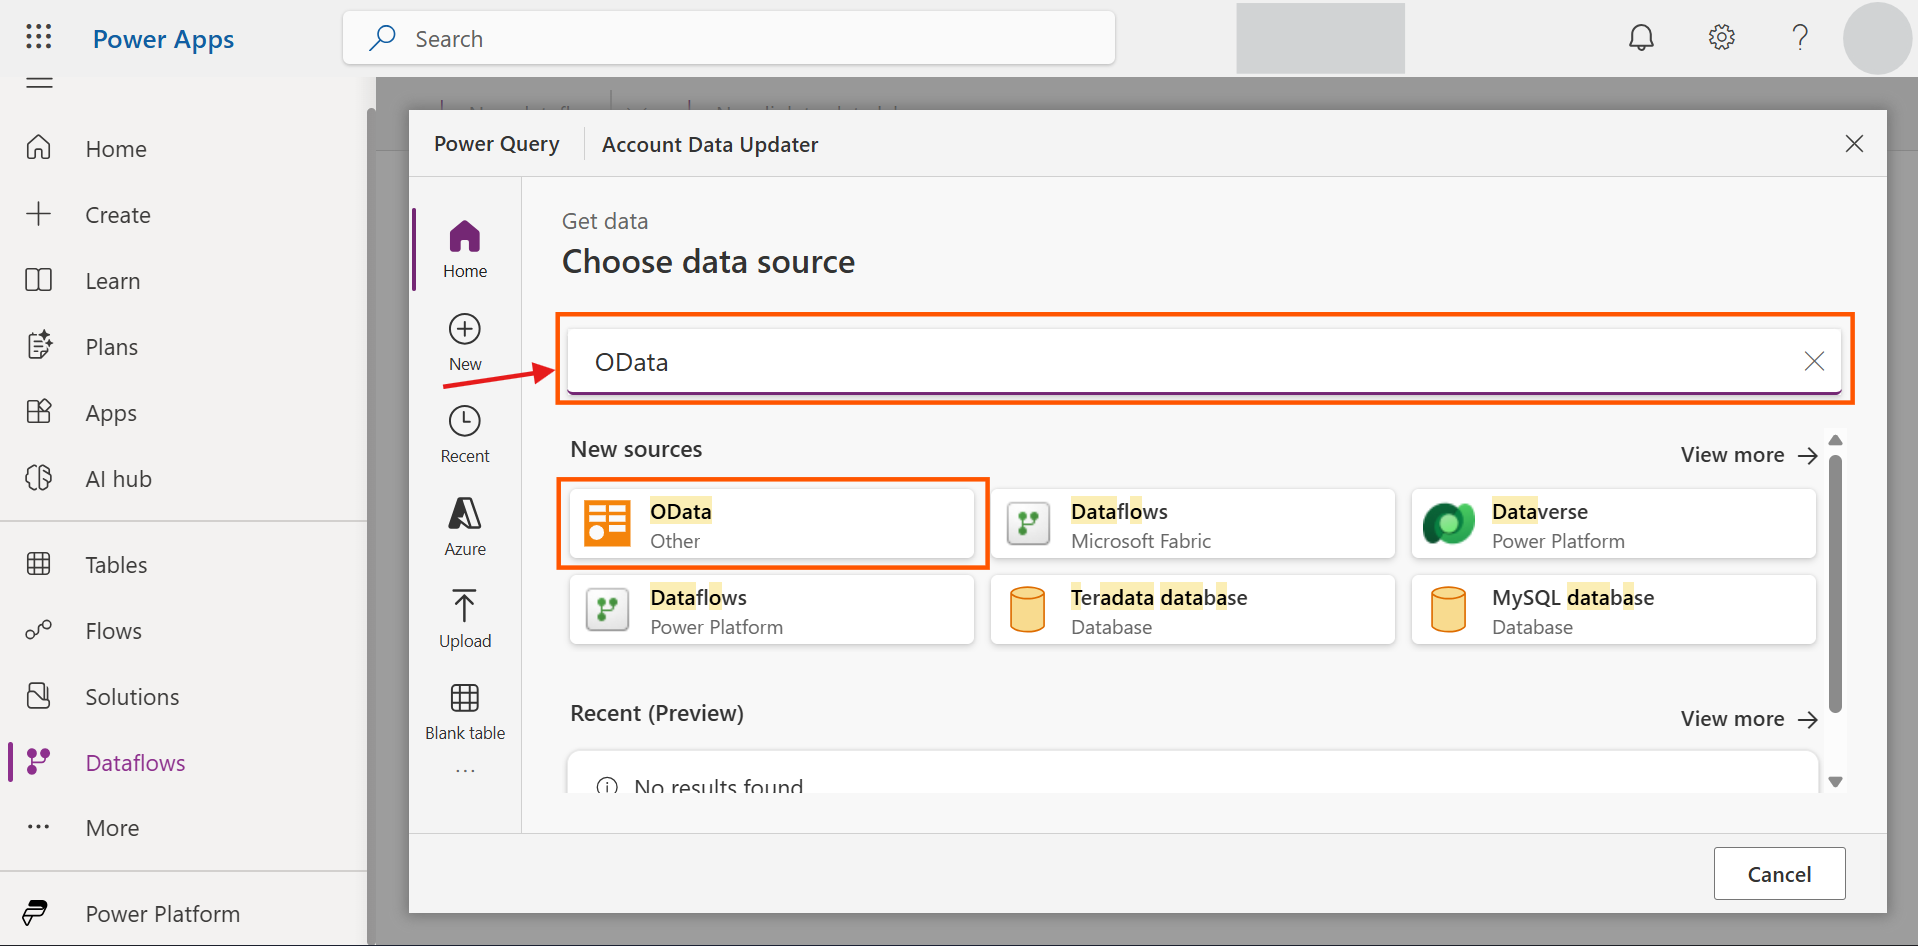
4. Enter “OData” in the search button (where arrow is pointing) and then Click “OData” available under “New sources”. This OData we will get from business central. Under Step 4, you can navigate from Step A – Step D, which will show you how to get OData URL from Business Central.
To Get OData that you have to use after step 4, follow below steps=>
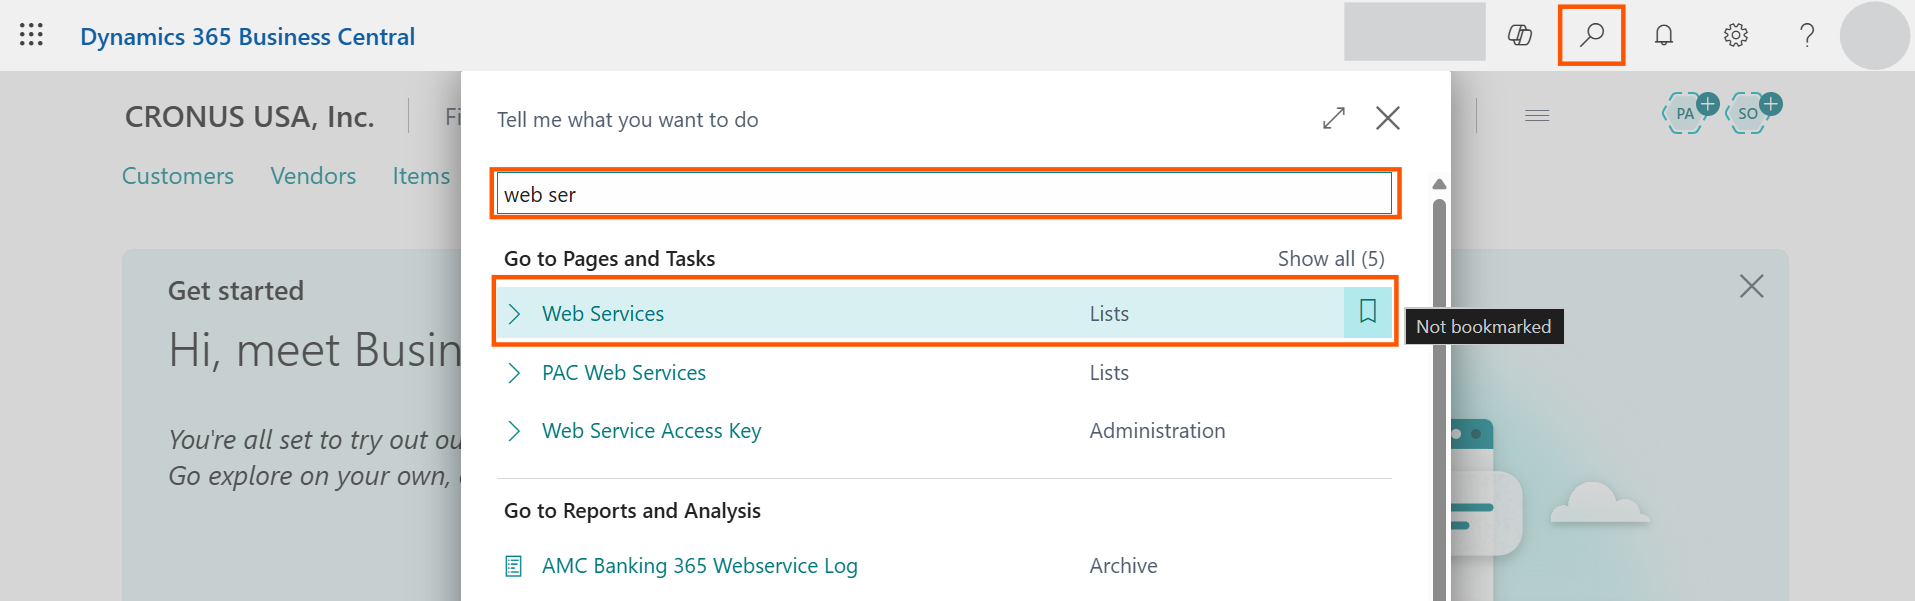
1.Go to your business central environment where you have all your customer data. Click on the “Magnifying Lens” and then in “Tell me what you want to do” search for “Web Services” and then Click “Web Services” available in “Go to Pages and Tasks”.
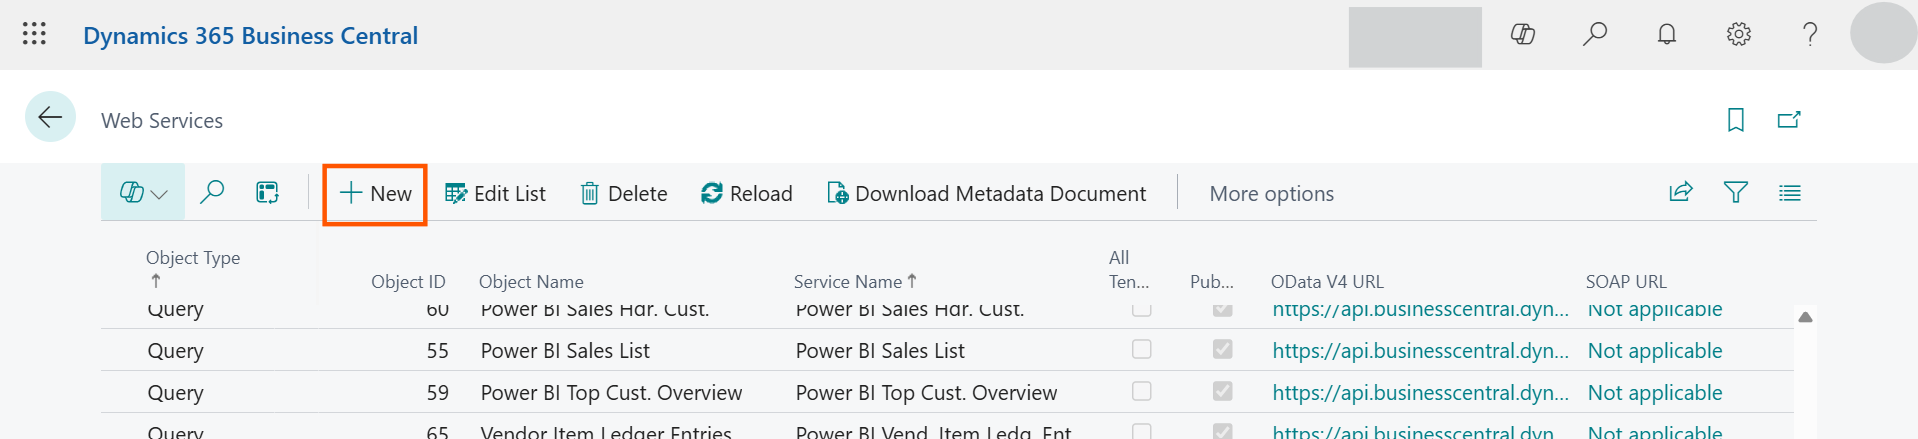
2.Click New.
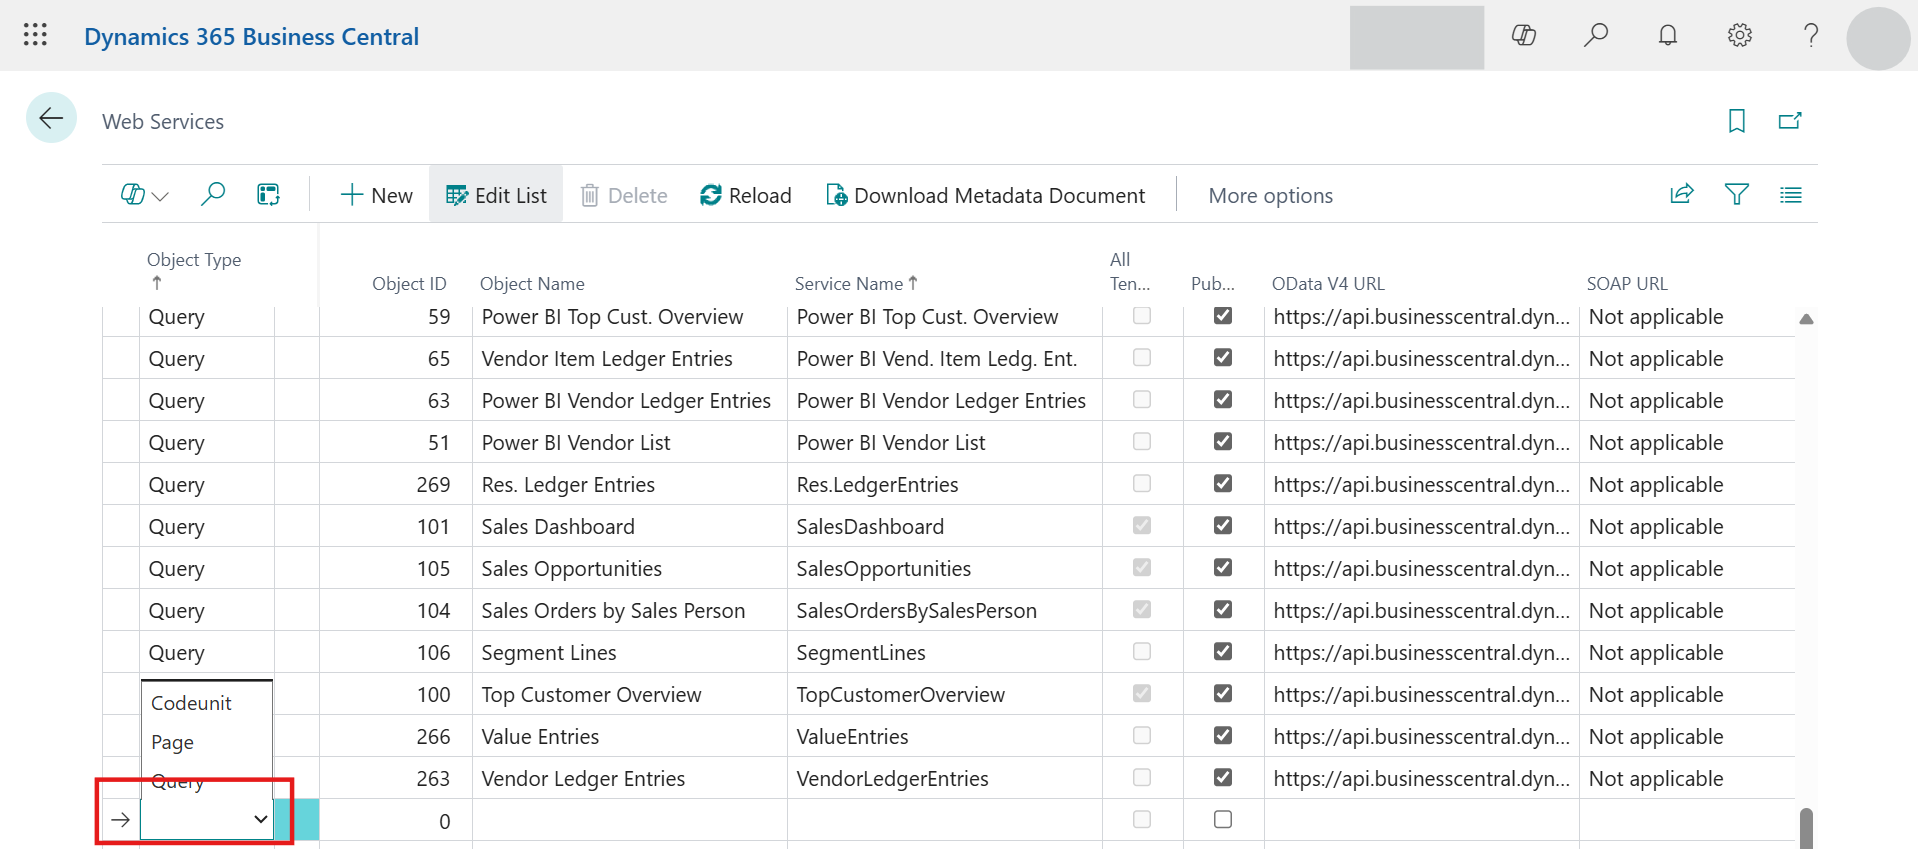
3.In the first dropdown select “Page”
4.Then for “Object ID” select 22, as 22 is the list page for Customers where all Customers shows up, then for Service name give a name of your choice and finally check the Checkbox for “Published”.
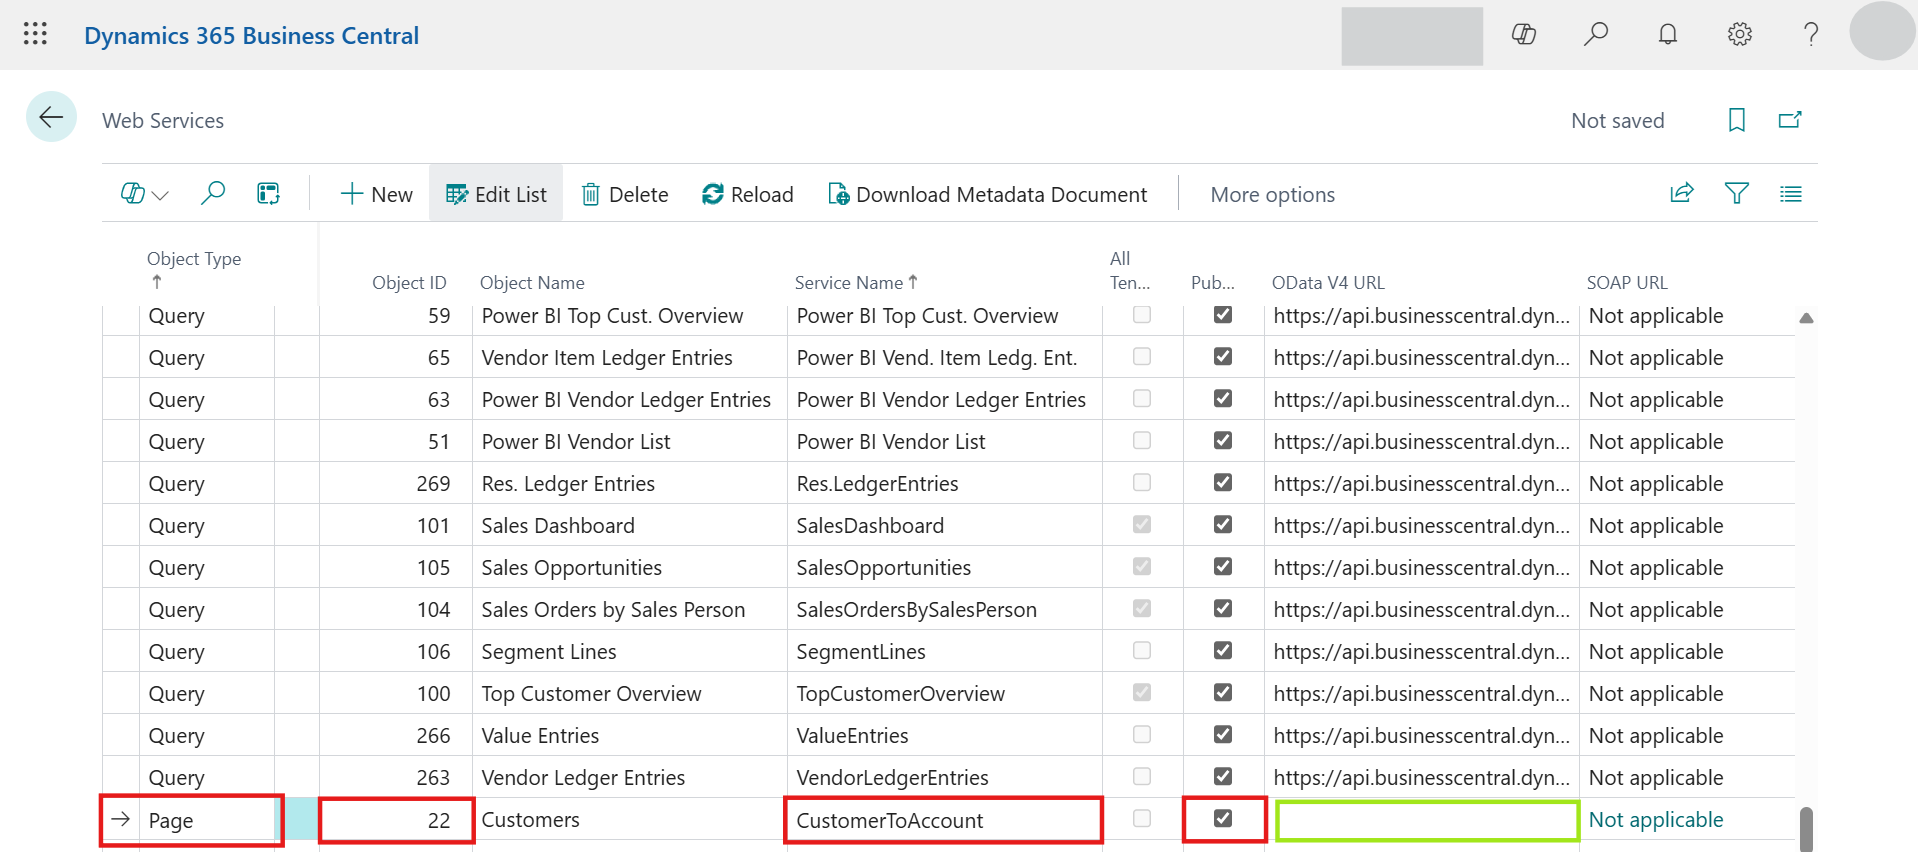
If you see closely to the field with caption “OData V4 URL” (Green Rectangle), the field is actually don’t have any URL, because our line is currently not saved as you can see above. So, to Save it Click on any line available on the top/below to the line you created. Then you will see the URL and also “Saved” (Green Rectangle where arrow is pointing) as below.
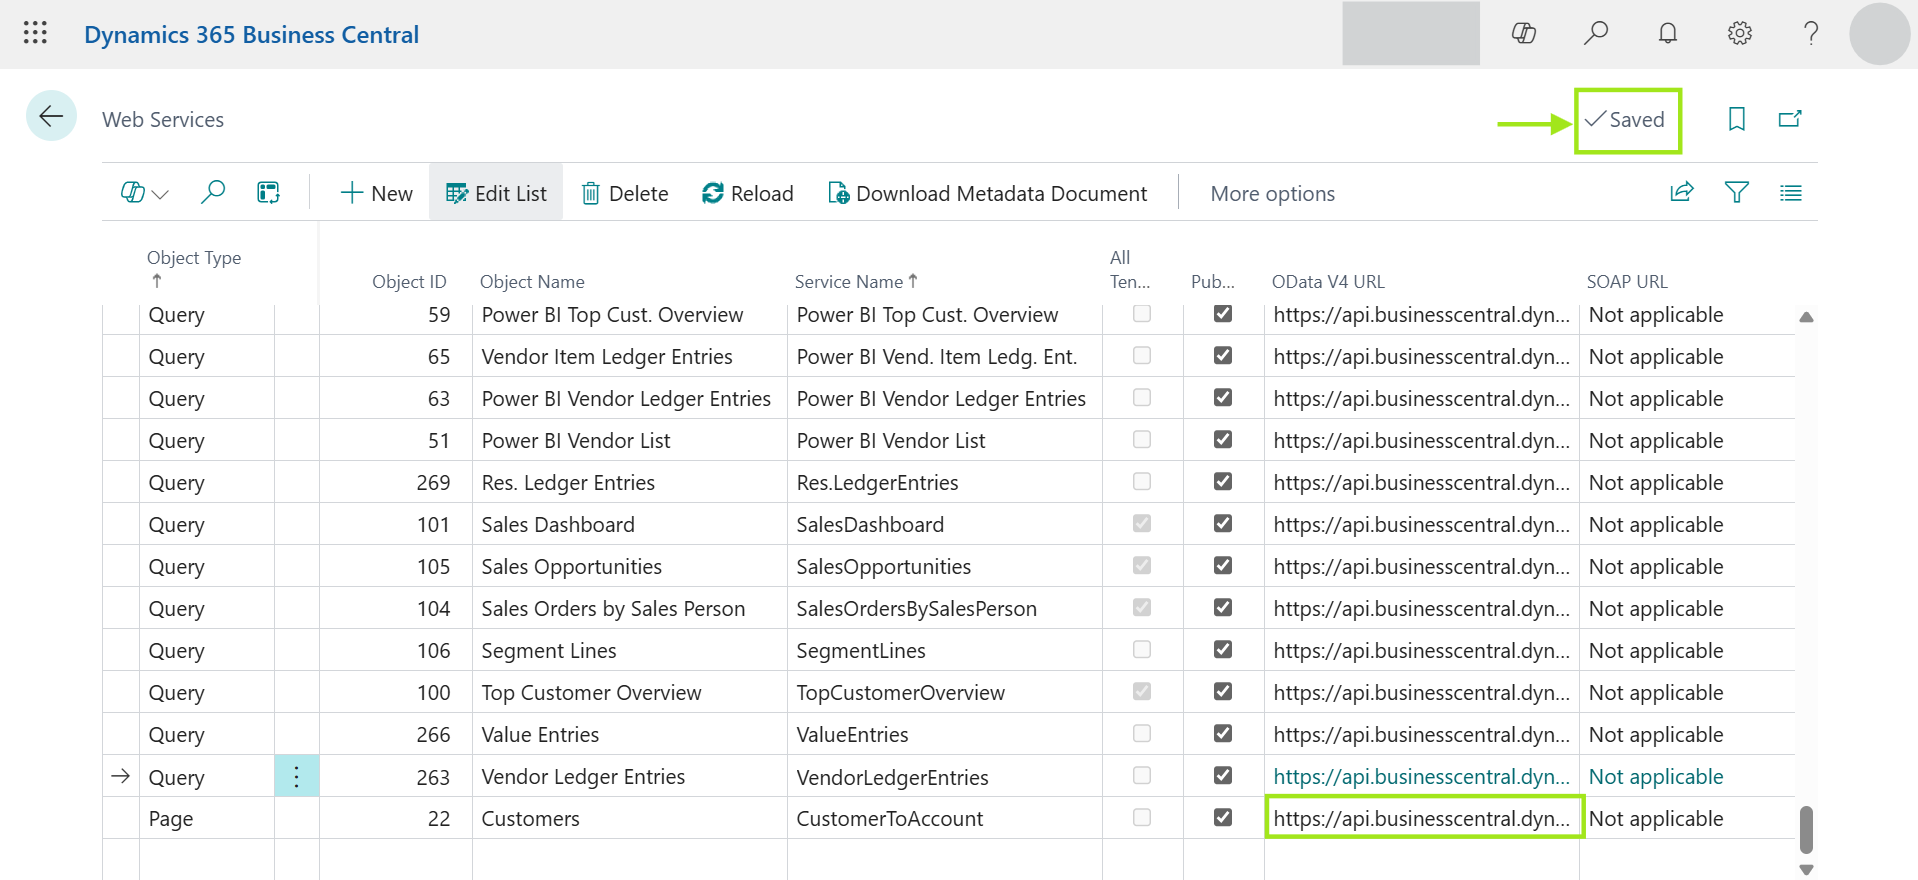
Once you click on other line like I did, you will get your “OData V4 URL”. Now Copy the URL by right clicking as we need it on Step 5.
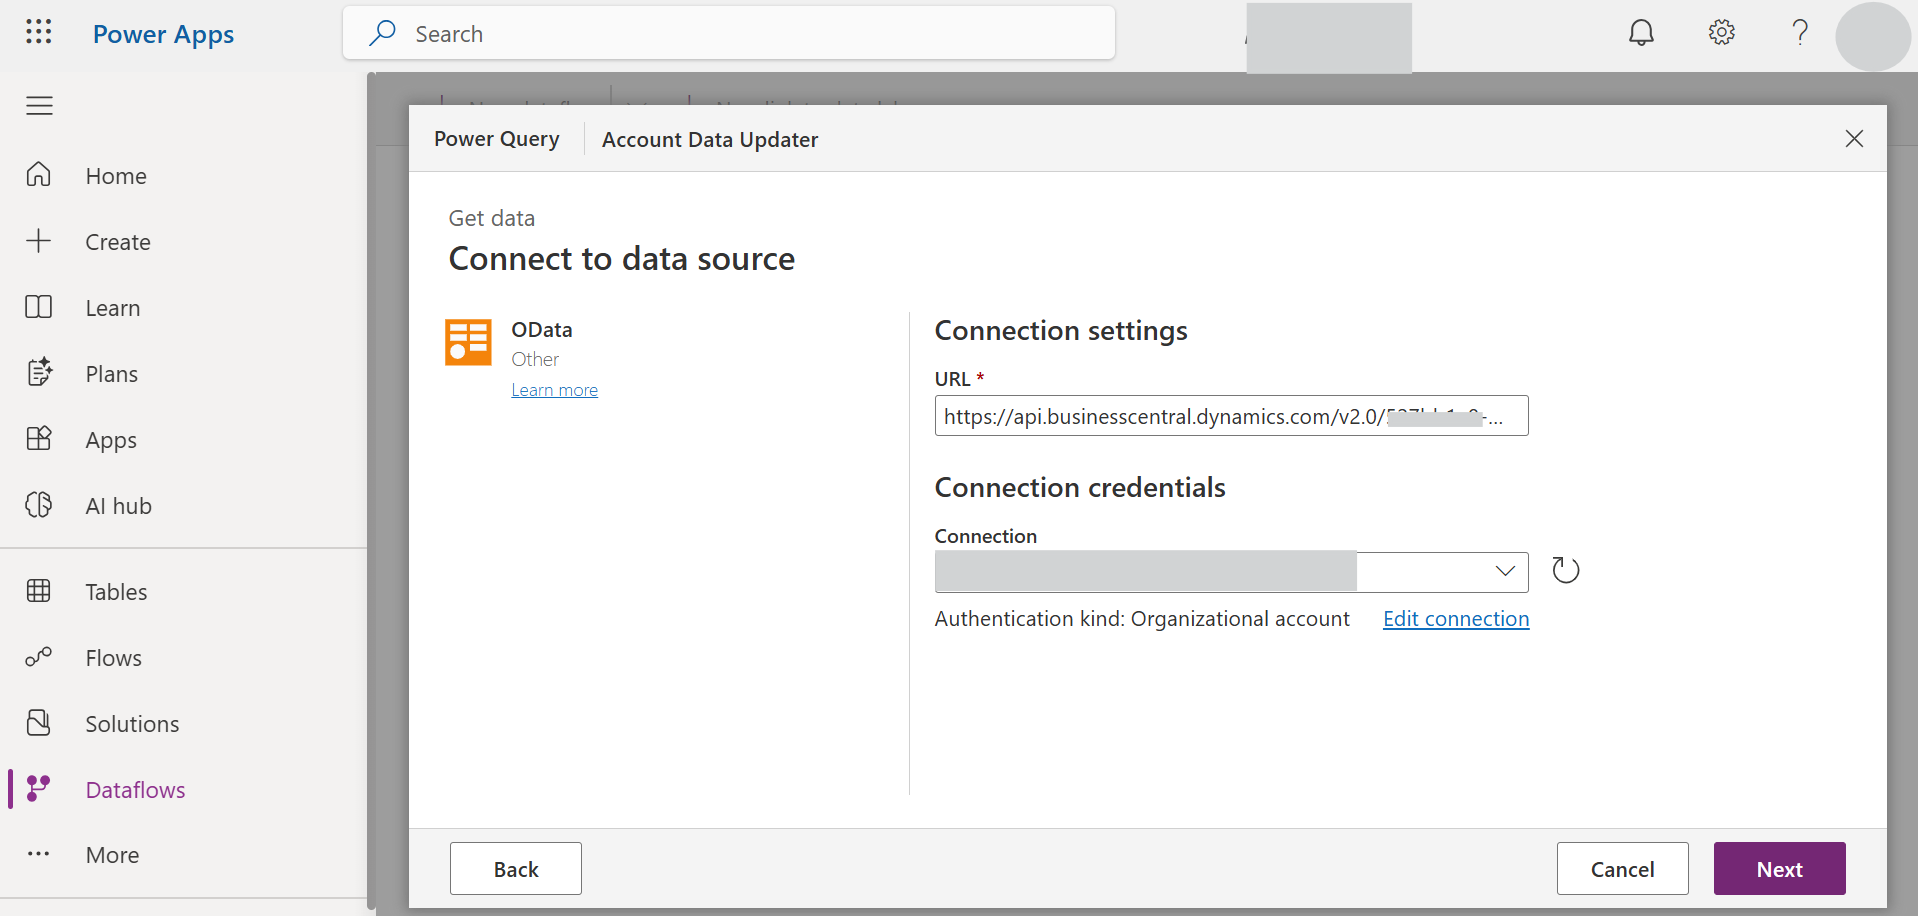
5.Now the link that you got from business central, paste it in the URL Field. If you already have your connection setup with OData then it will sign you in automatically and will allow you to click “Next” like below.
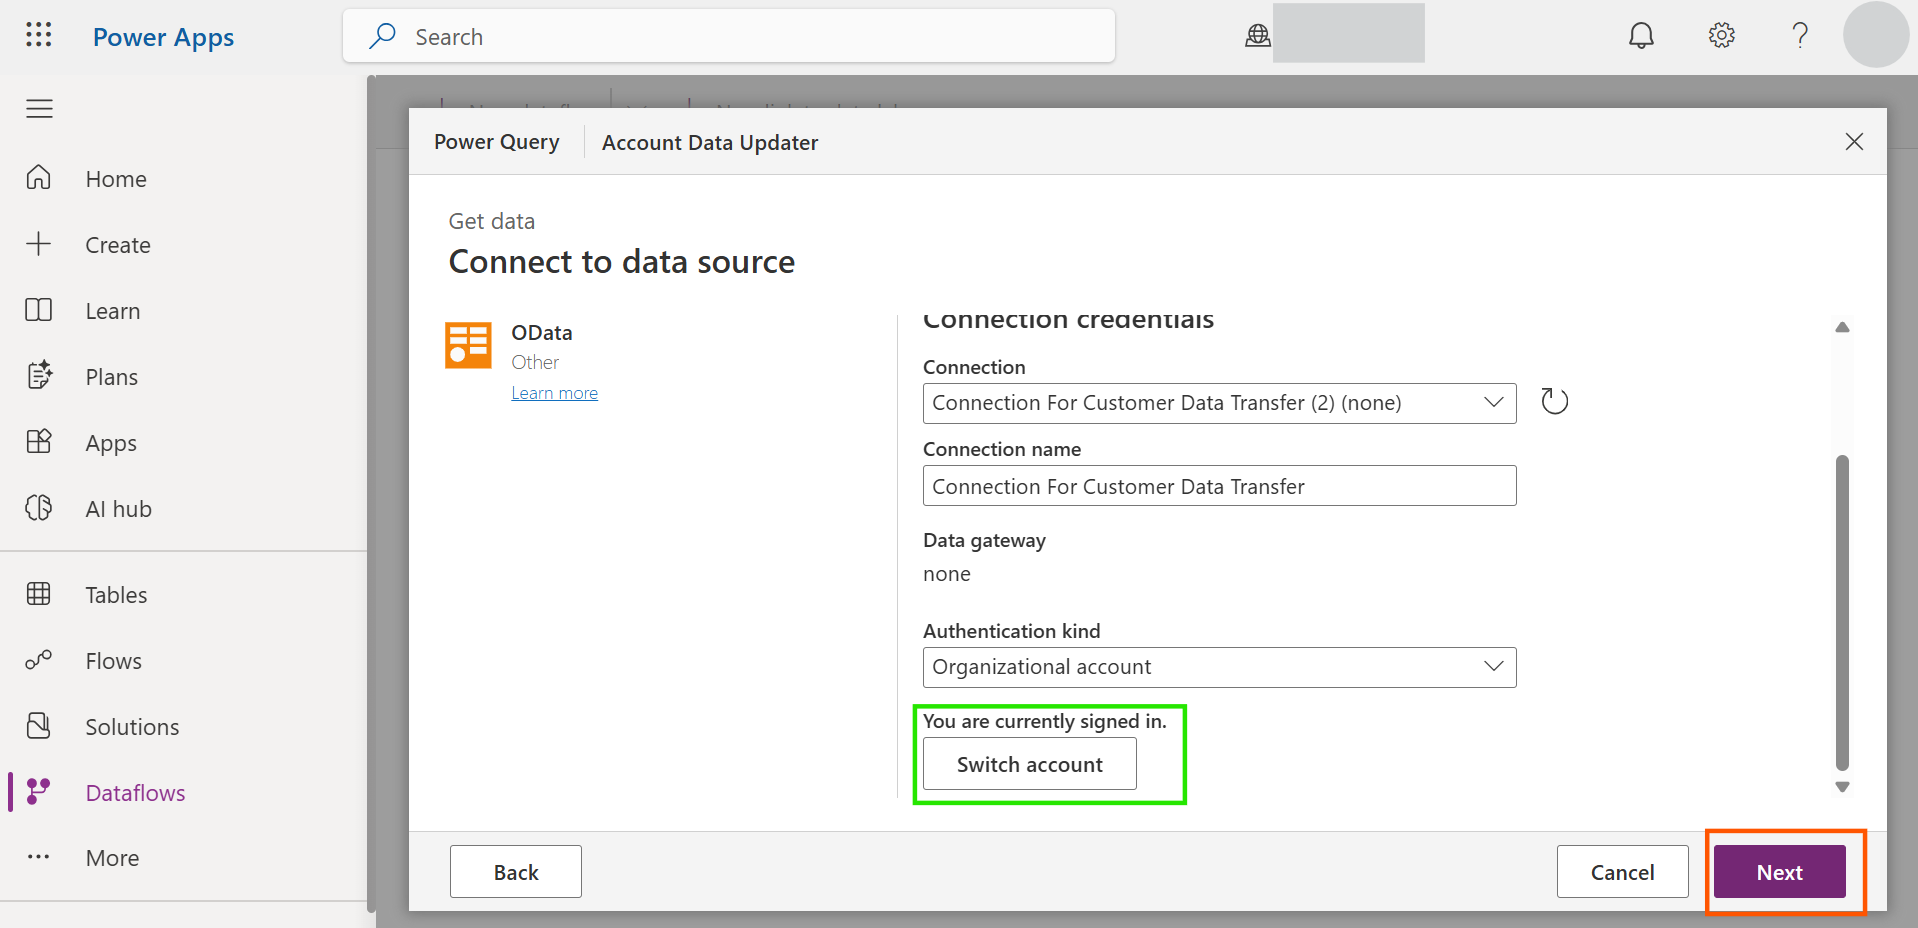
Or, if you never signed in, you will get a UI like below. Below I am sharing two screenshots, as in one all can’t cover.
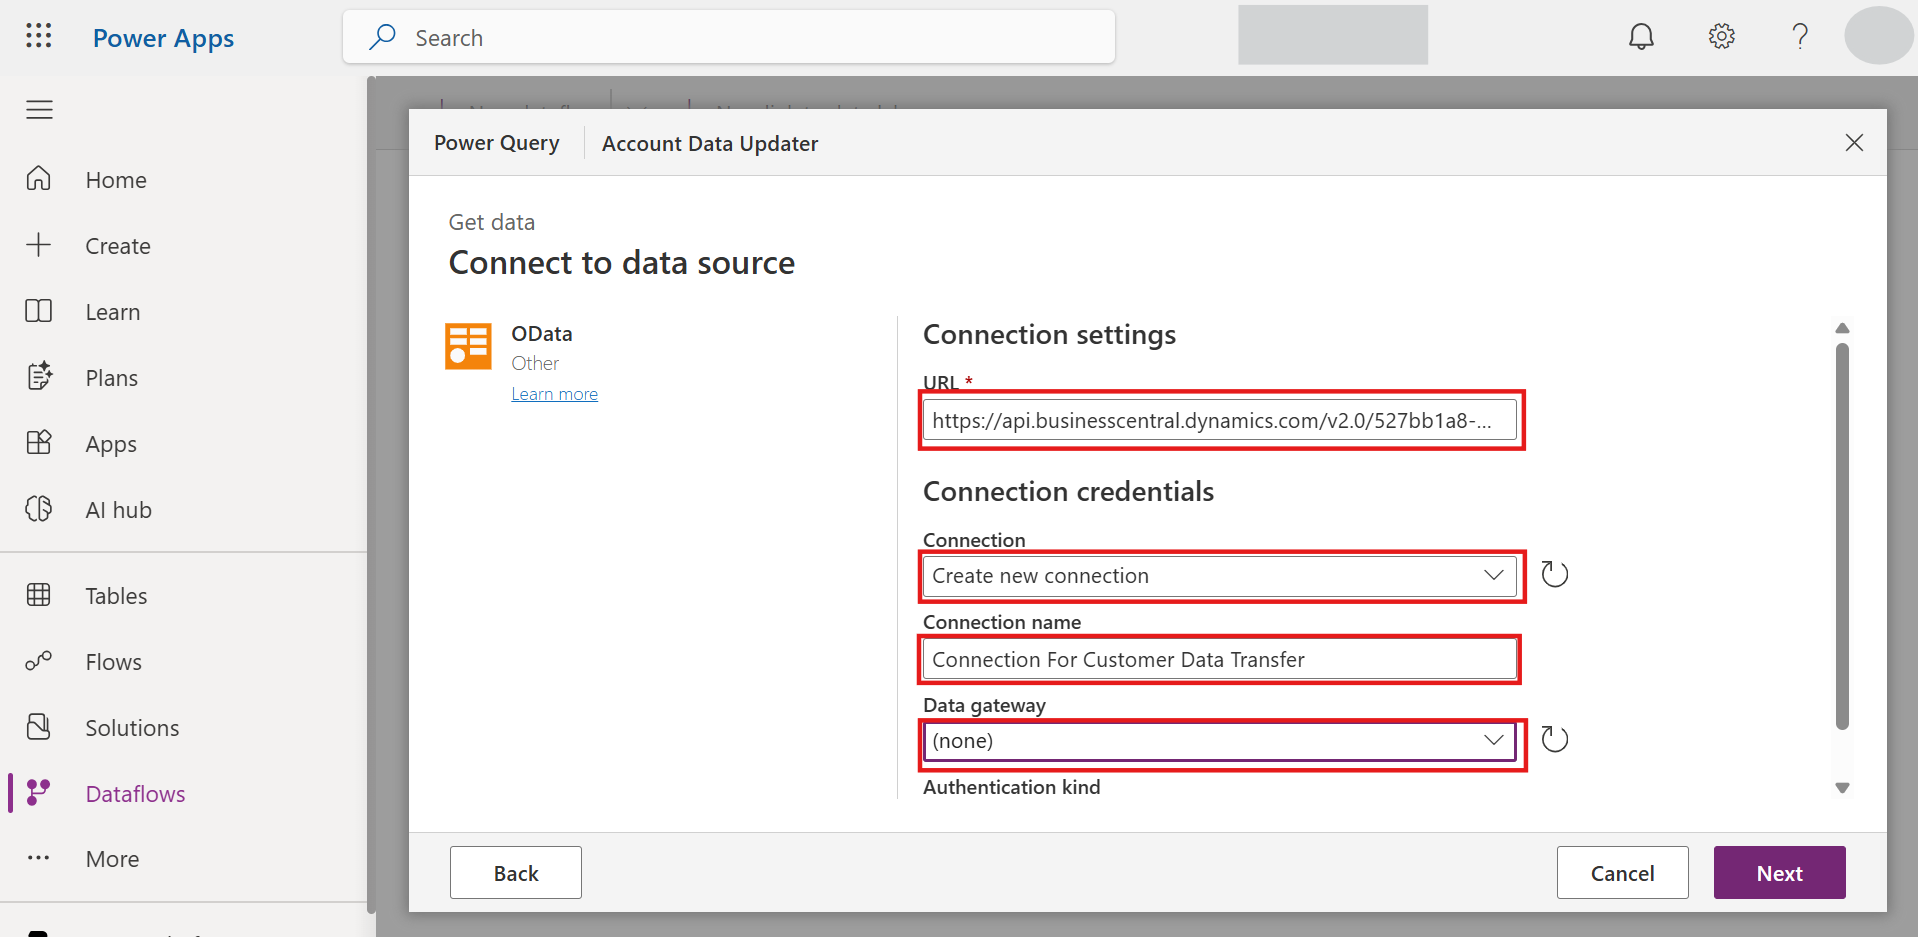
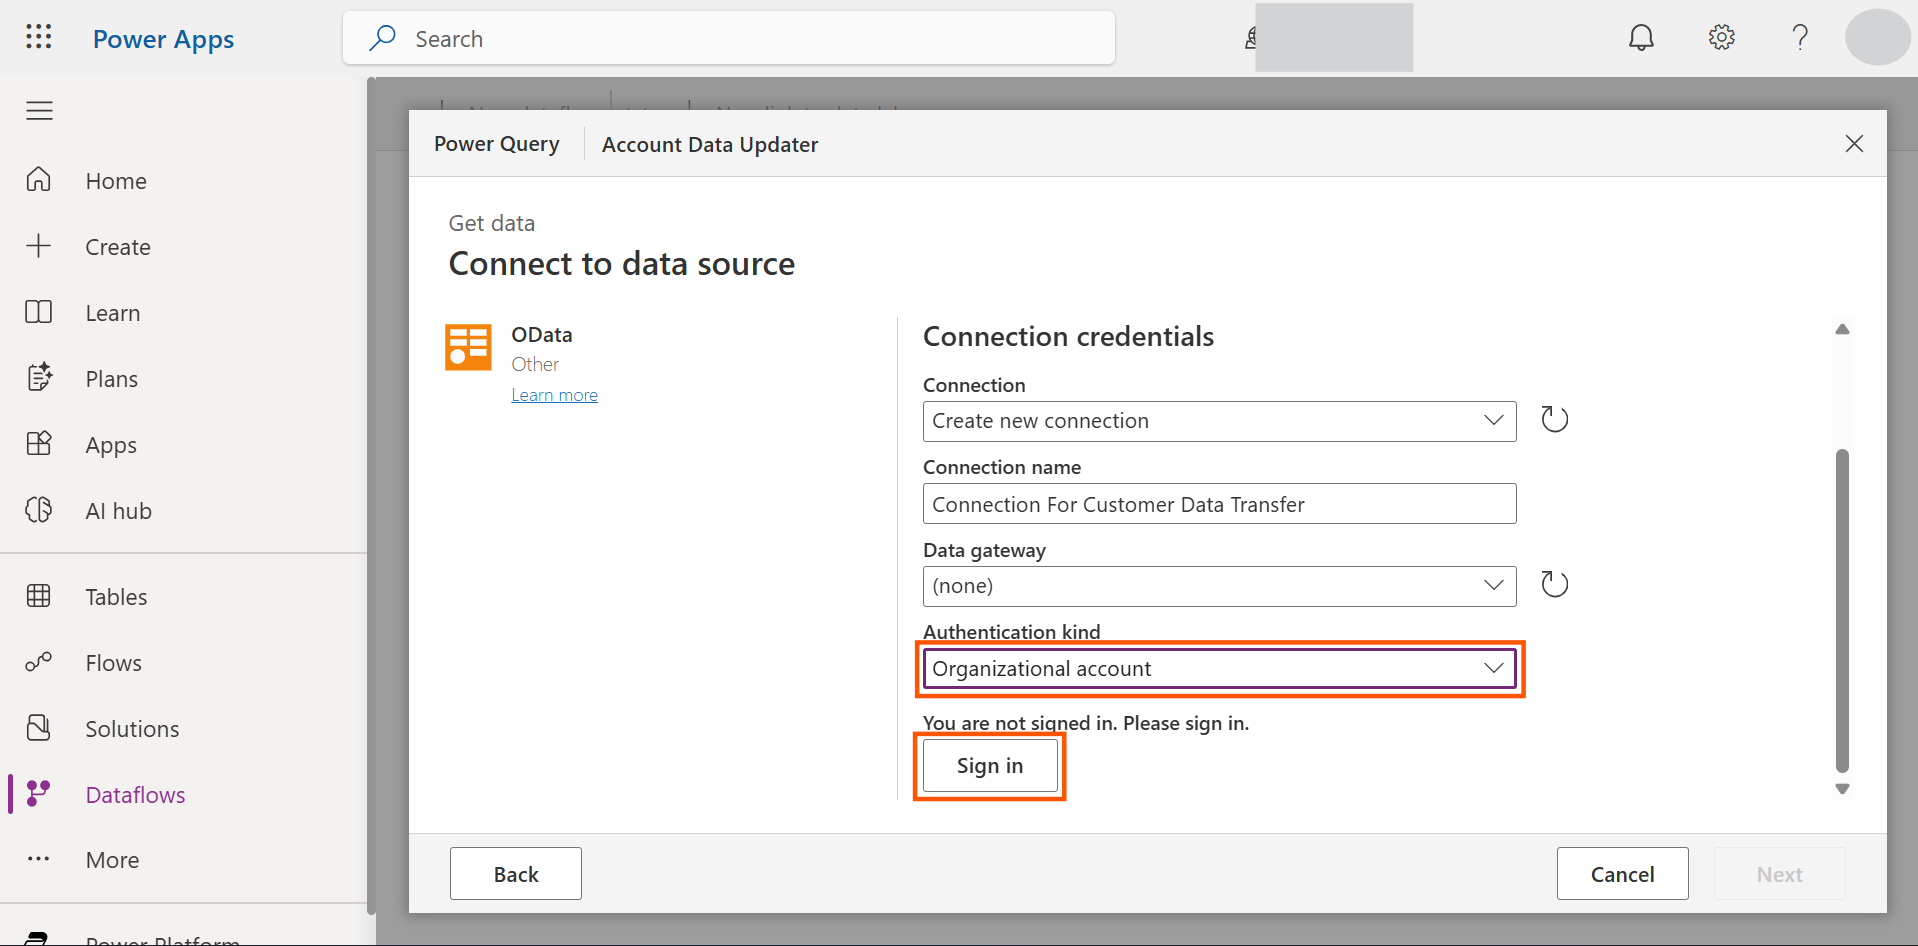
In the URL field, give the URL that you got from Business Central Web Services. Then for “Connection” dropdown, choose “Create new connection”. Then for “Connection name”, give any name of your choice. Coming to “Data gateway” keep it “none”. Then finally for “Authentication kind”, choose “Organizational account”. Now Click “Sign in”, it will take you to Microsoft website so that you can login using your mail ID. Once you successfully signed in you will see, that you are signed in like below. Then you can click “Next”.
6.After clicking Next, you must see all data of Customer Table from business central like below.
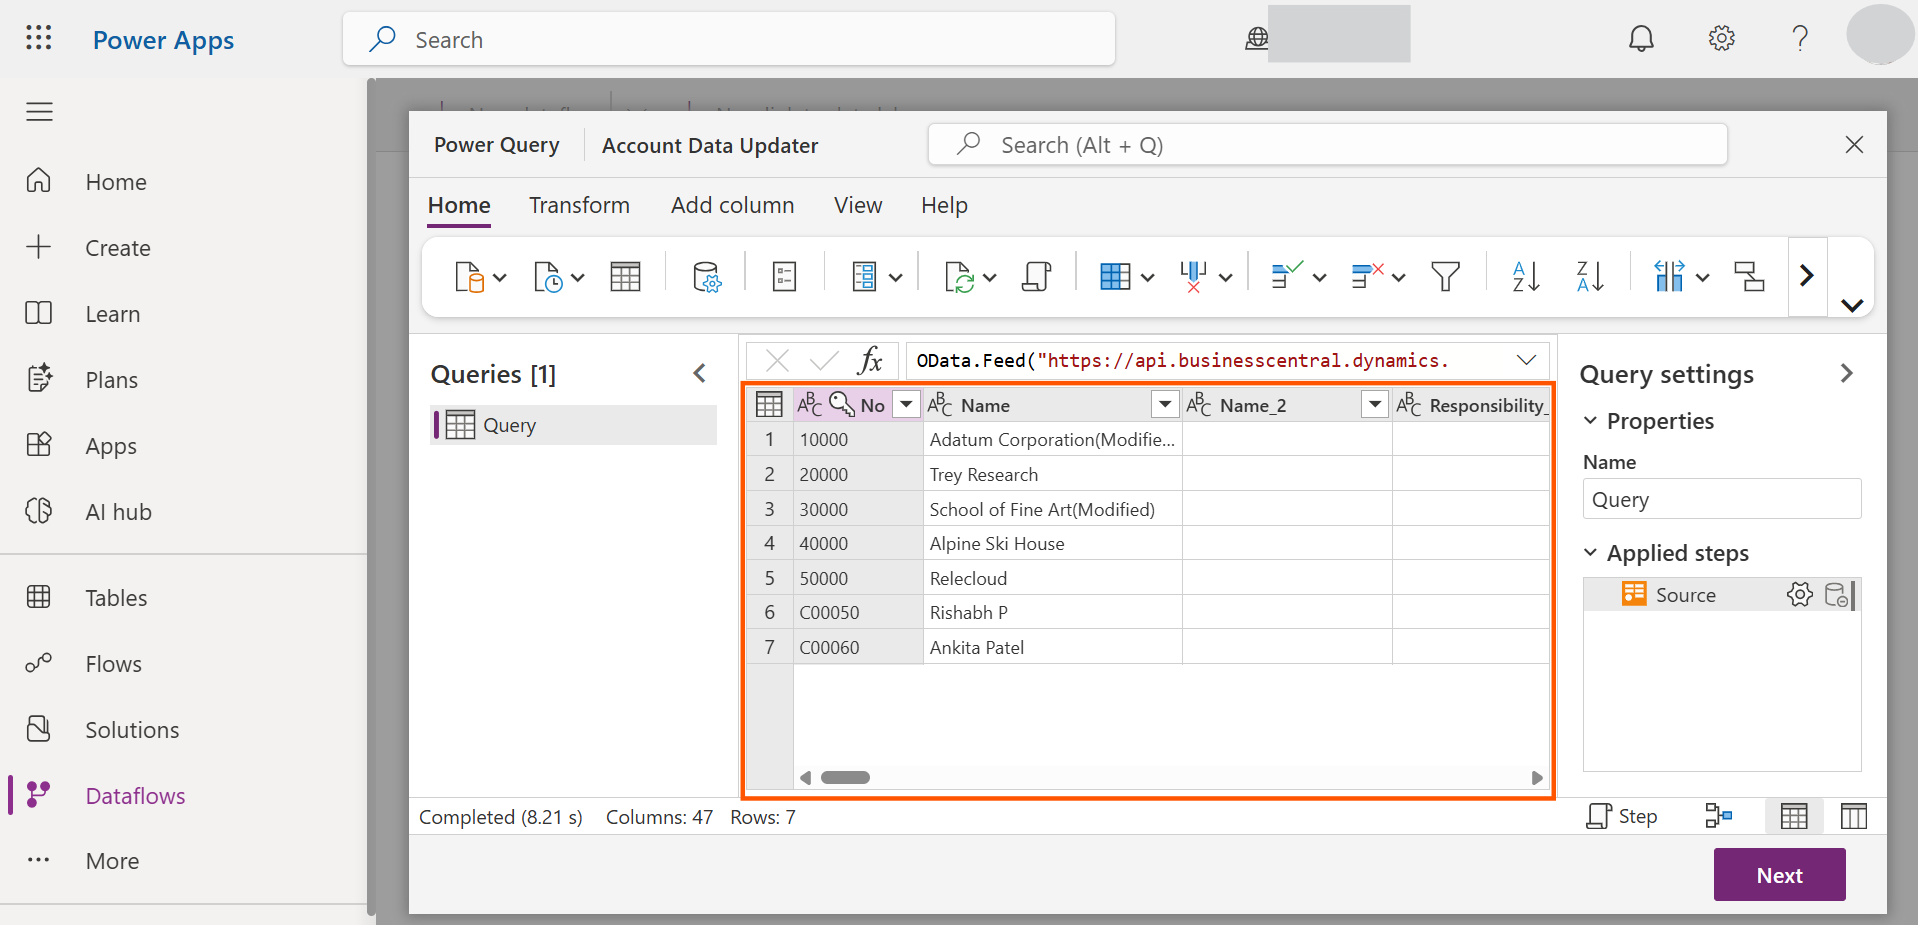
7.You can do some simple formatting for Integer/Double fields of Customer table, so that it will not conflict with Account table of Business Central, e.g. Customer table have integer field for “No.”, while Account wants it as text. So, likely if you get any error like this while doing the data flow you can change the data type as below.
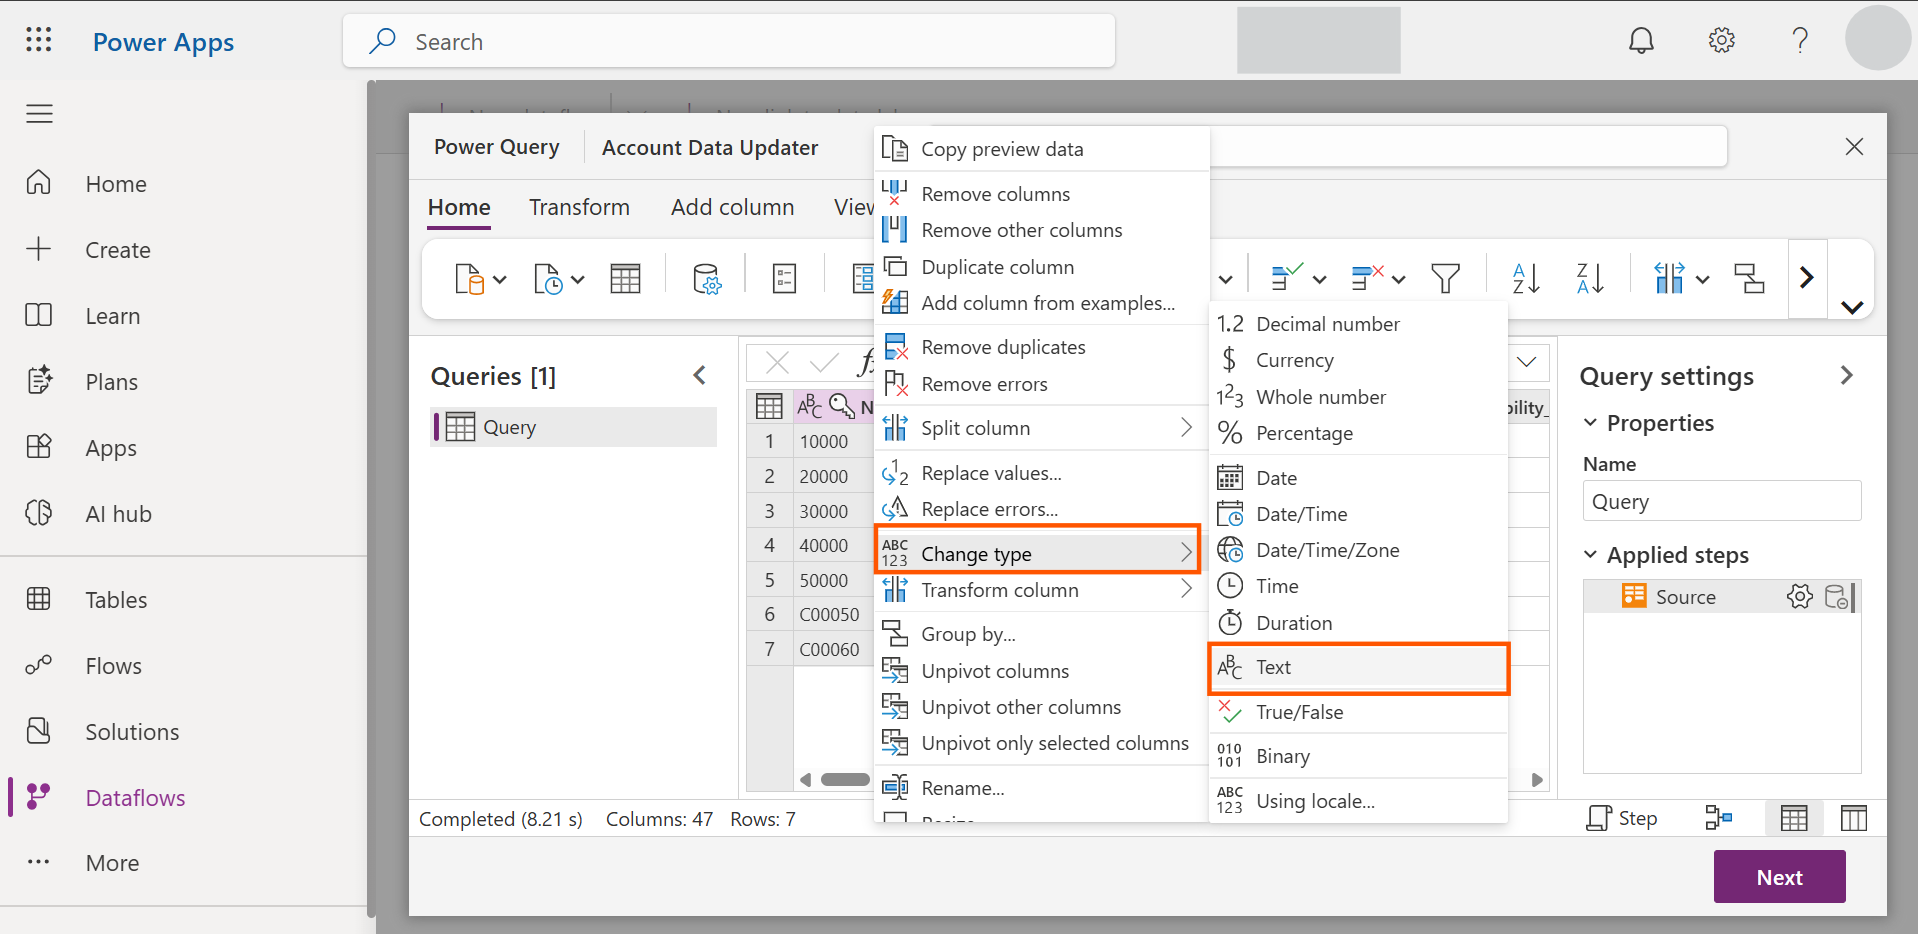
Here I did for “No.” field. To do the same, right click the “No.” field > “Change type” > “Text”. Same process you can you can do for other fields, either to change its type to text or anything that gives you error.
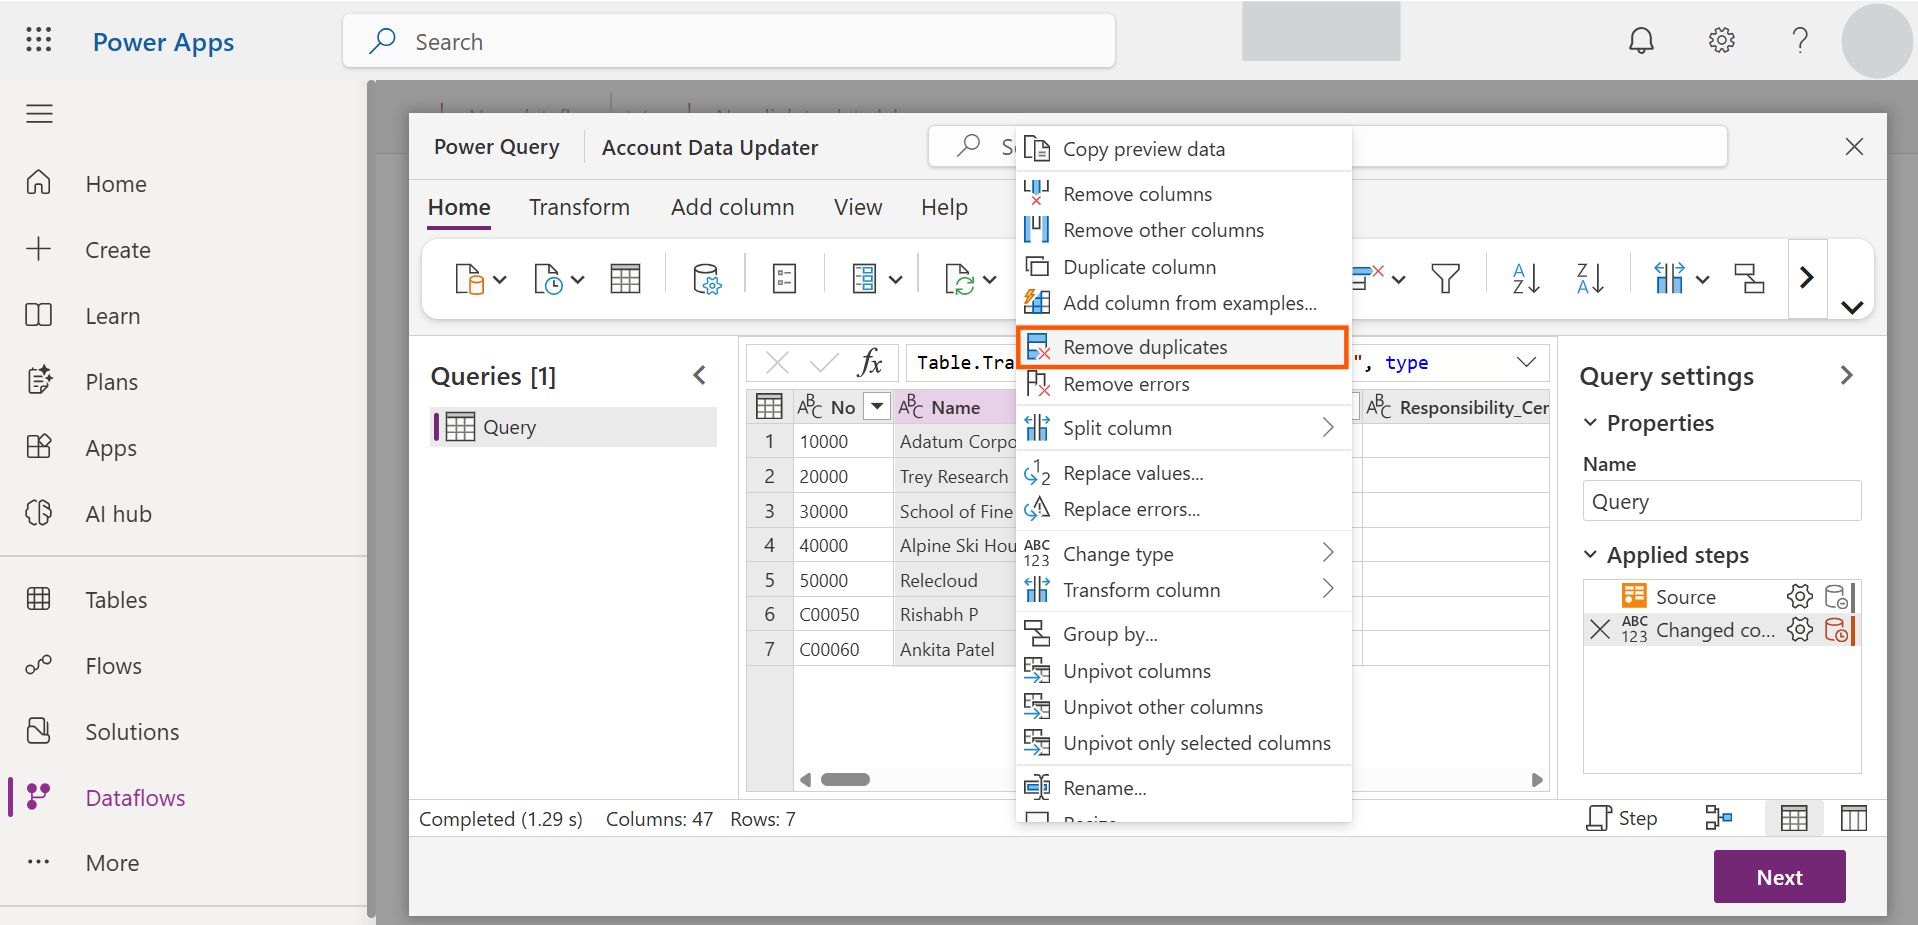
8.For Customer table in Business Central, the “No.” field is Primary Key. So, there is no possibility that it could be duplicate. But if you are worried that with different “No.”, a same customer exists, then you can remove duplicates also. Follow below step to do the same. Here, even though I don’t have any duplicates, I will do it for “Name” field.
To do so, right click the field you want to remove duplicates for, then click “Remove duplicates”.
Now if you are OK with the data that you are going to flow to Account table of Dataverse “Next”.
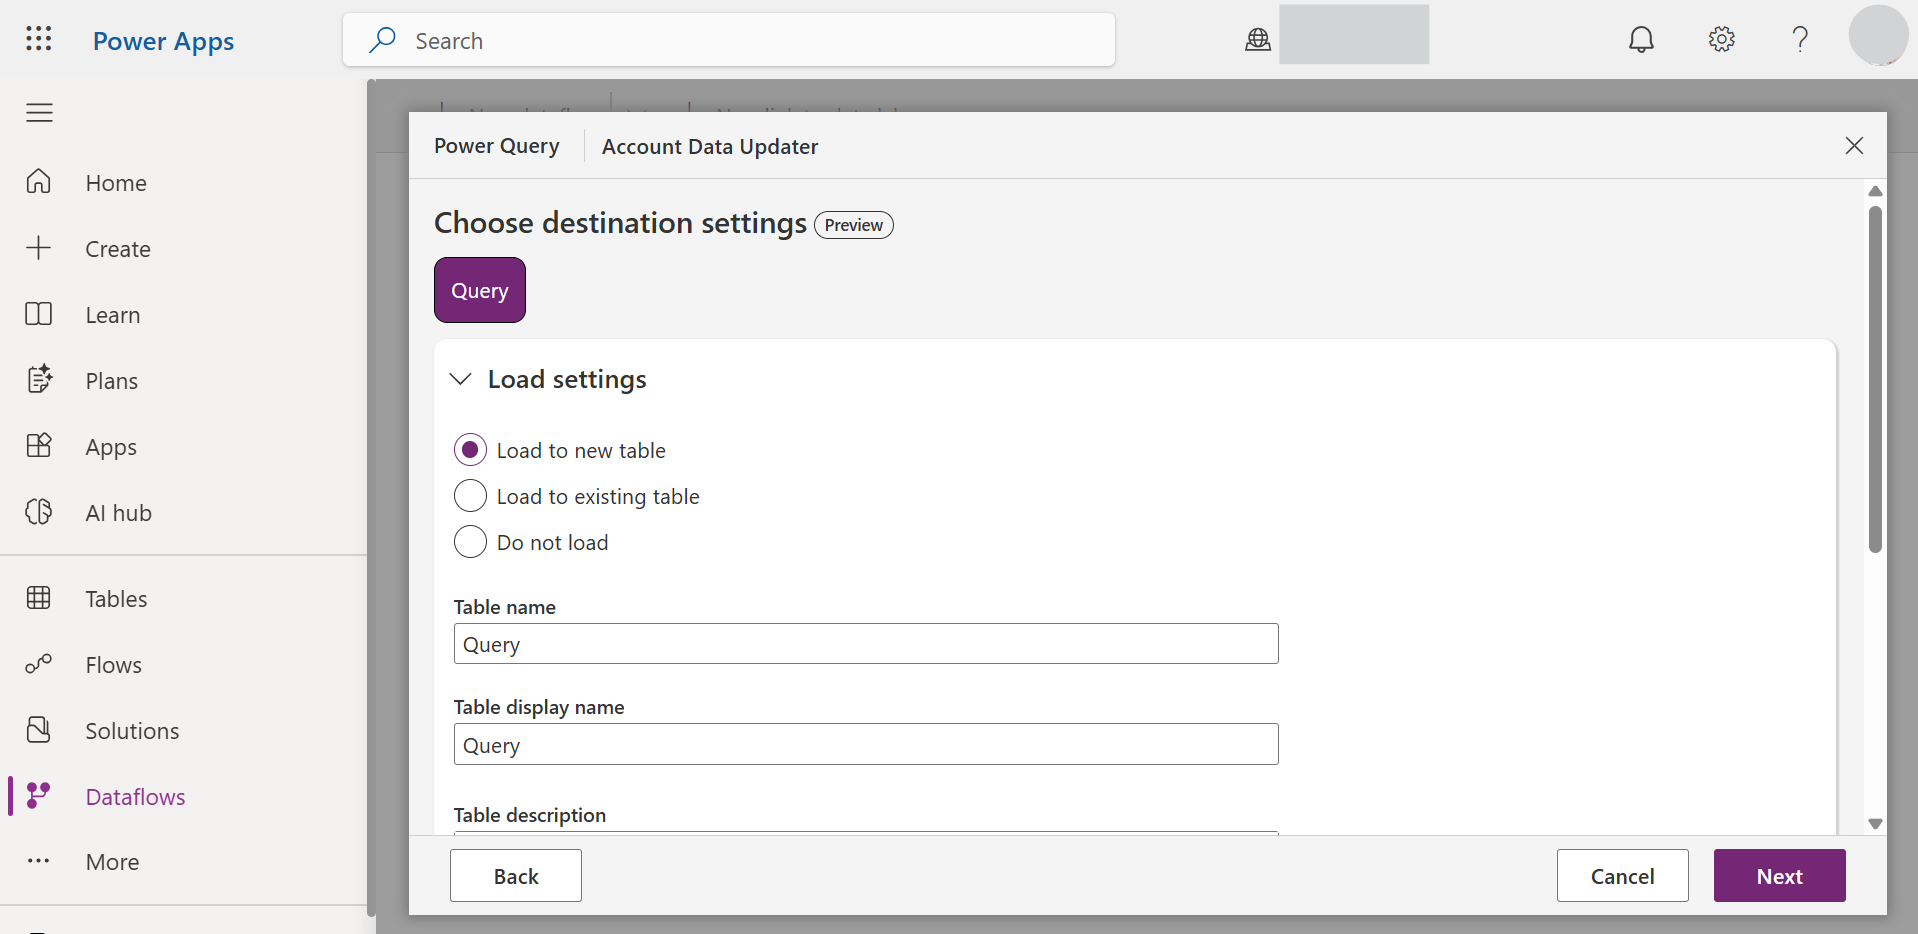
9.Upon Clicking “Next”, you will see a page like below. Here, by default the “Load settings”, is selected to “Load to new table”. Here we don’t want to create a new table and map the columns, but what we want is, the “Account” table which already exists in Dataverse, we will take data to that table. So, we will go for “Load to existing table”.
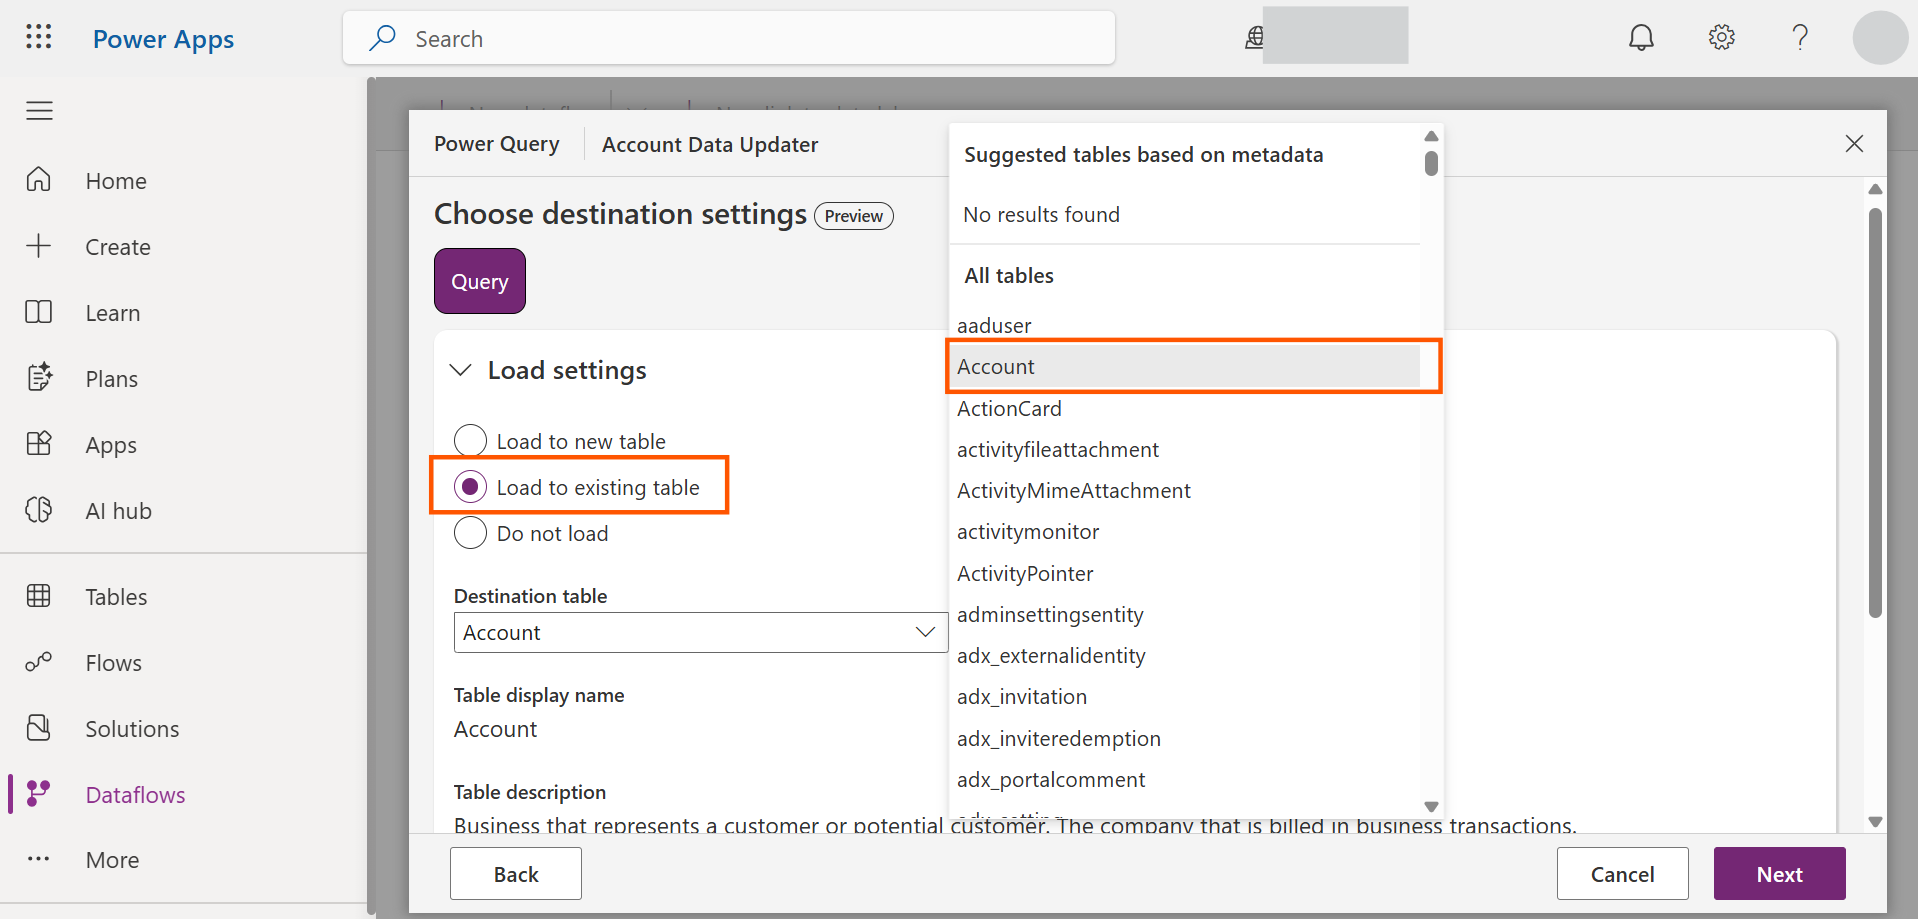
10.Now Click on “Load to Existing Table” and then for Destination table choose “Account”.
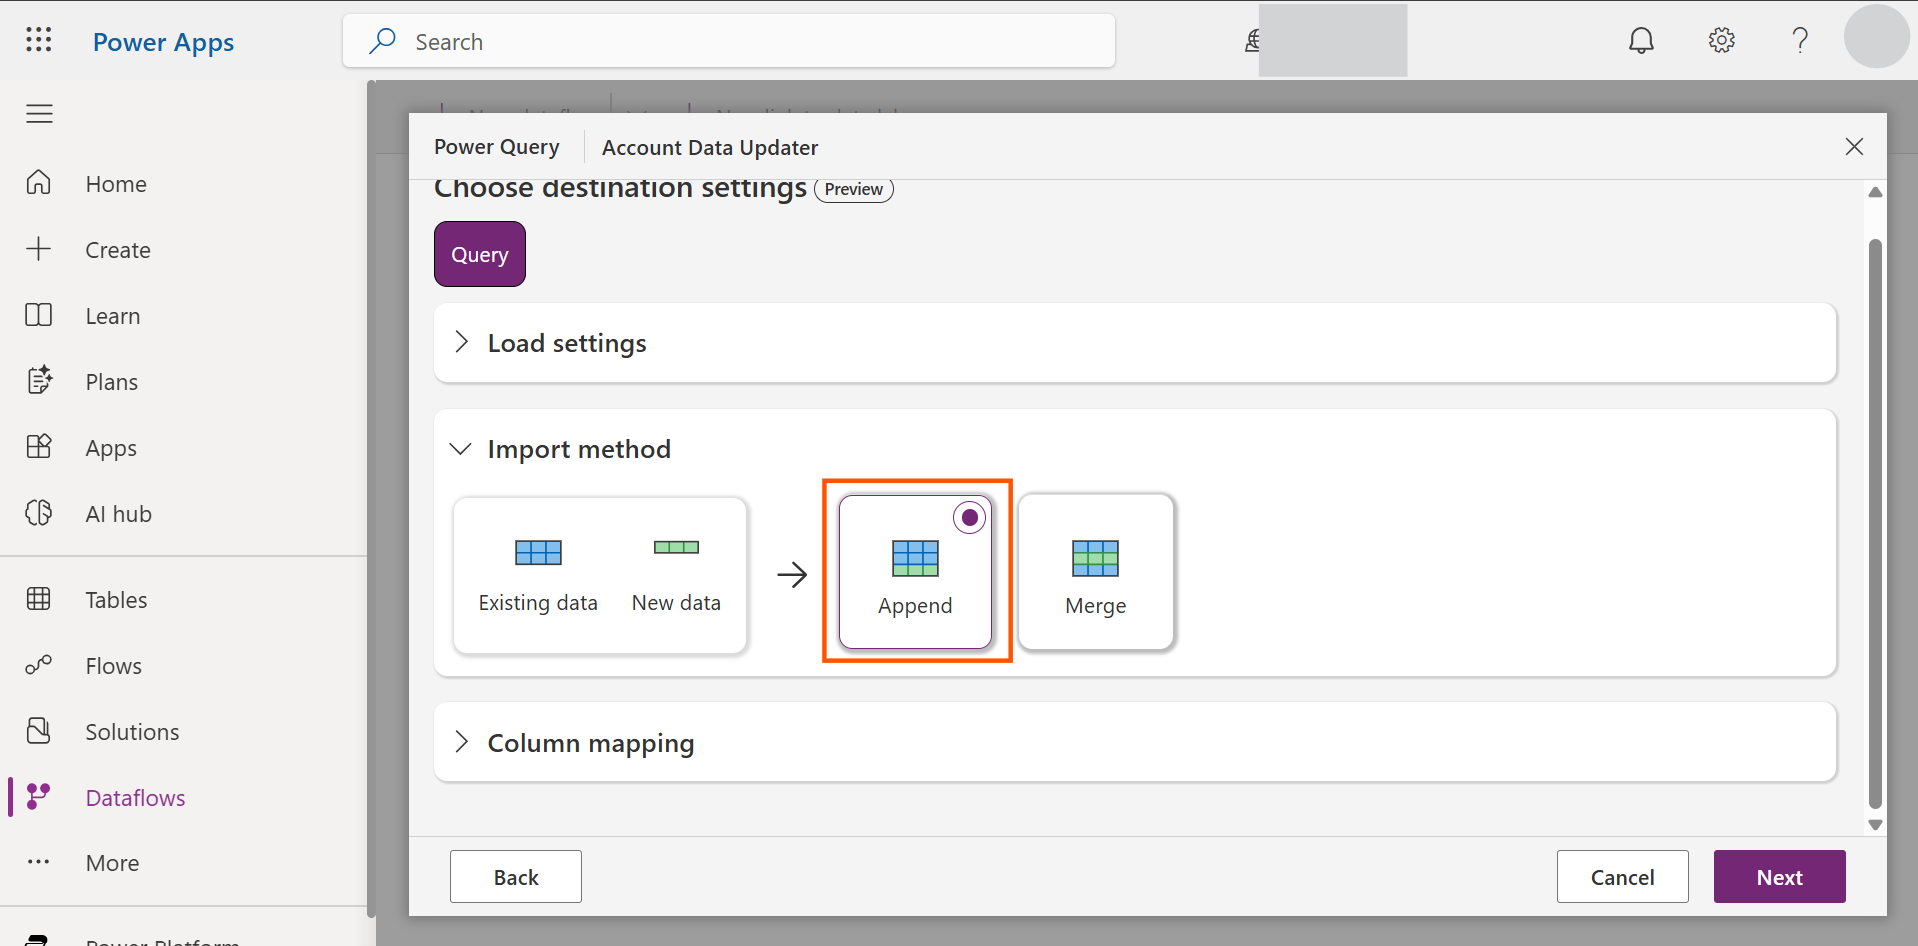
11.Now we are ready to go for “Import Method”. Here go with “Append”.
12. Then we can go for “Column Mapping”. Here you will see all the columns which are mapped automatically. You can also change this. Here the “Source Column” means columns from “Customer” table of Business central and “Destination Column” means columns from “Account” table of Dataverse. Note that, the data will be transferred only for Mapped columns. So, if you are Okay with Mapped columns, then you can click “Next”.
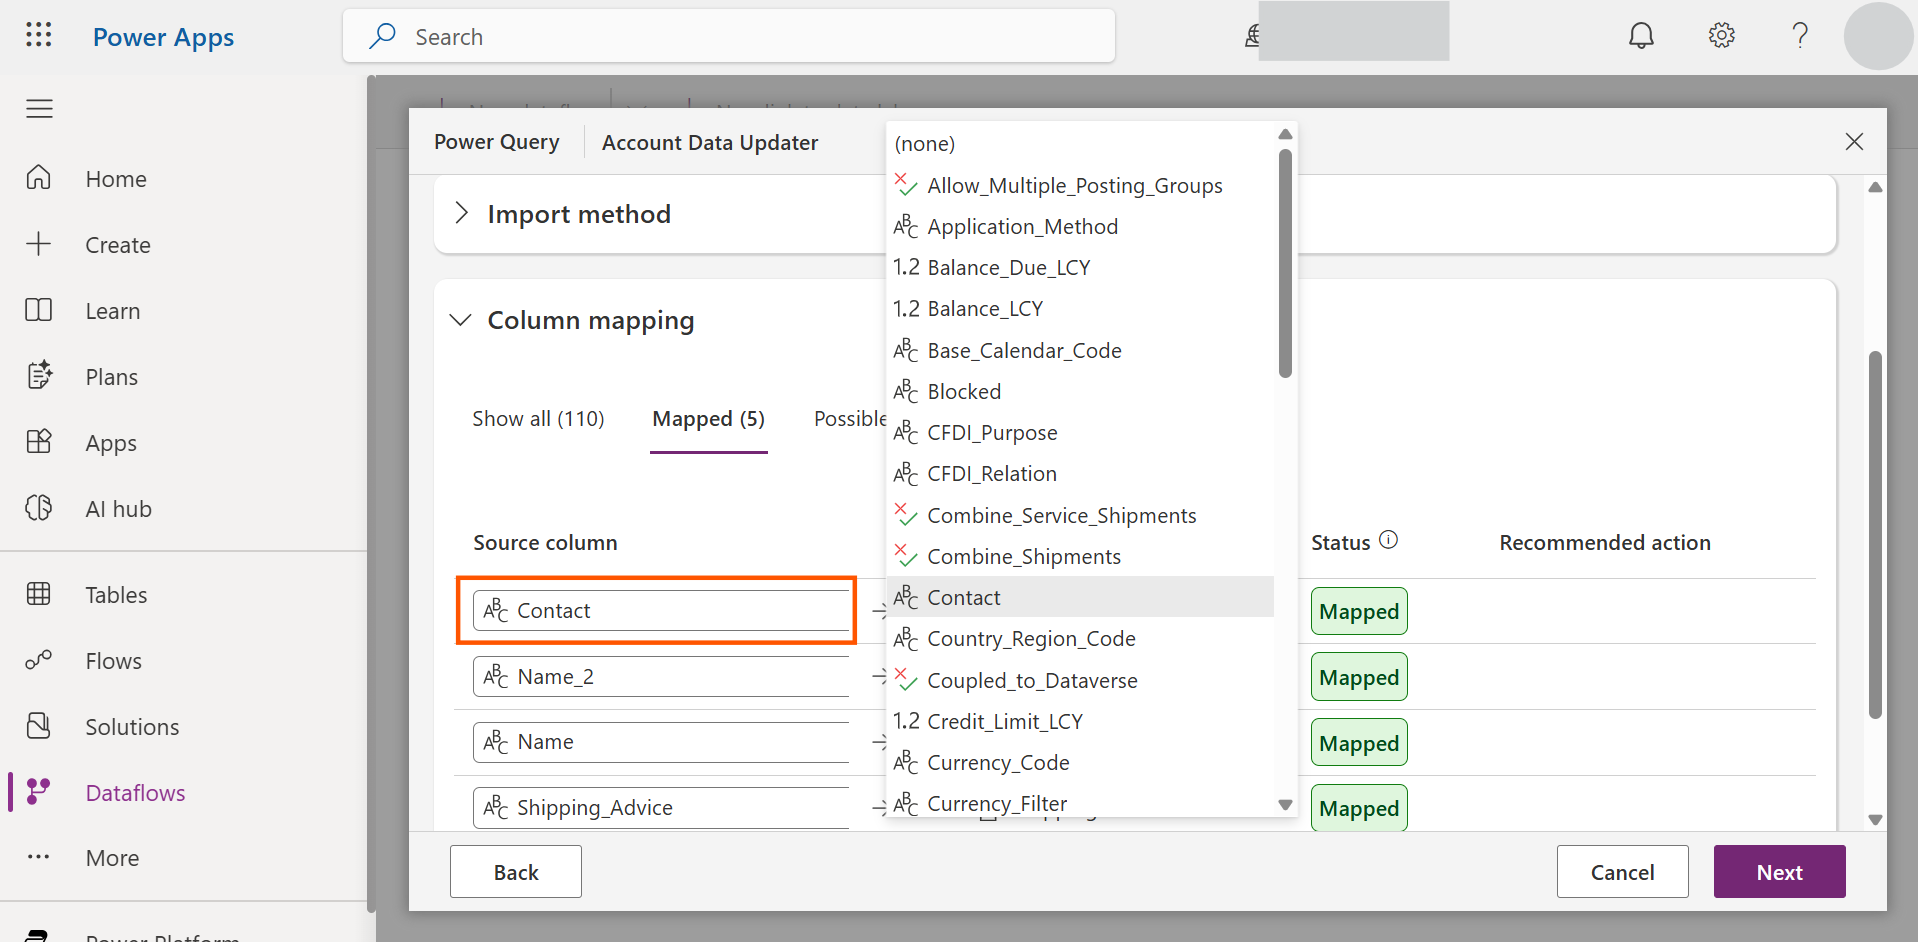
If you want to map more columns, then you can do it under “Unmapped” like below.
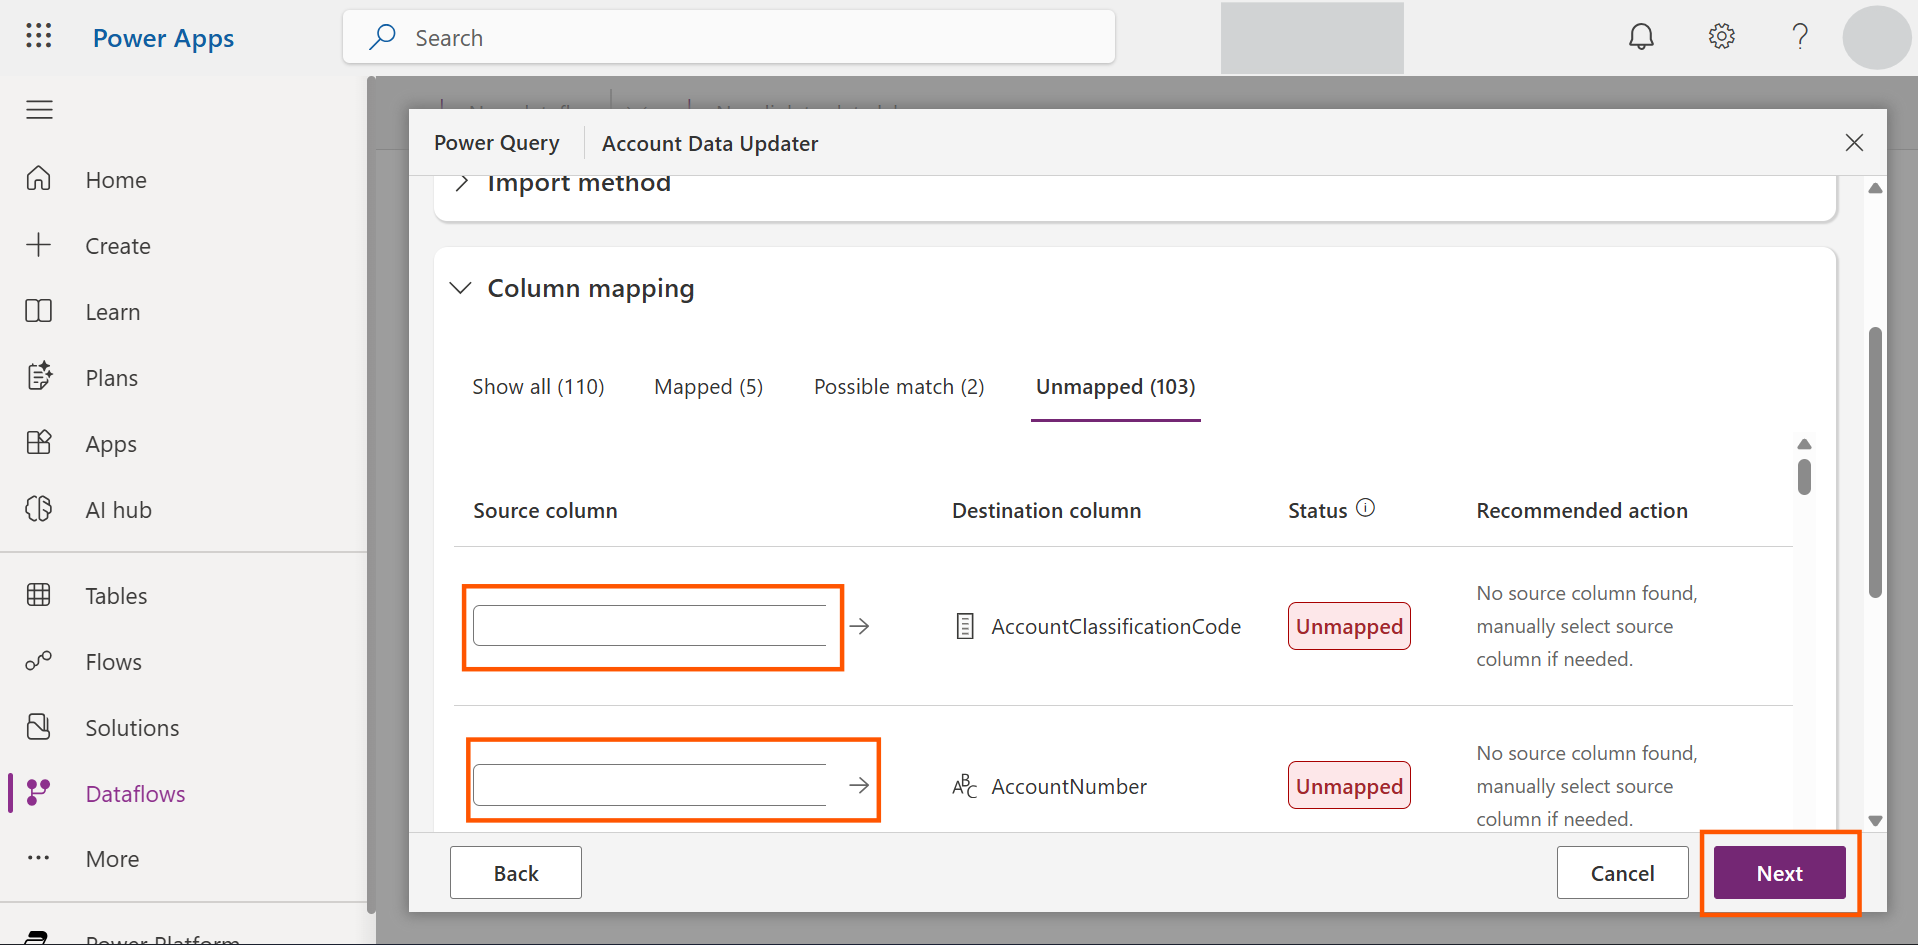
Click the “Source Column” field and choose which column it should map with the “Destination Column”. Then Click “Next”.
13.Once you click Next, you will see the next UI like below.
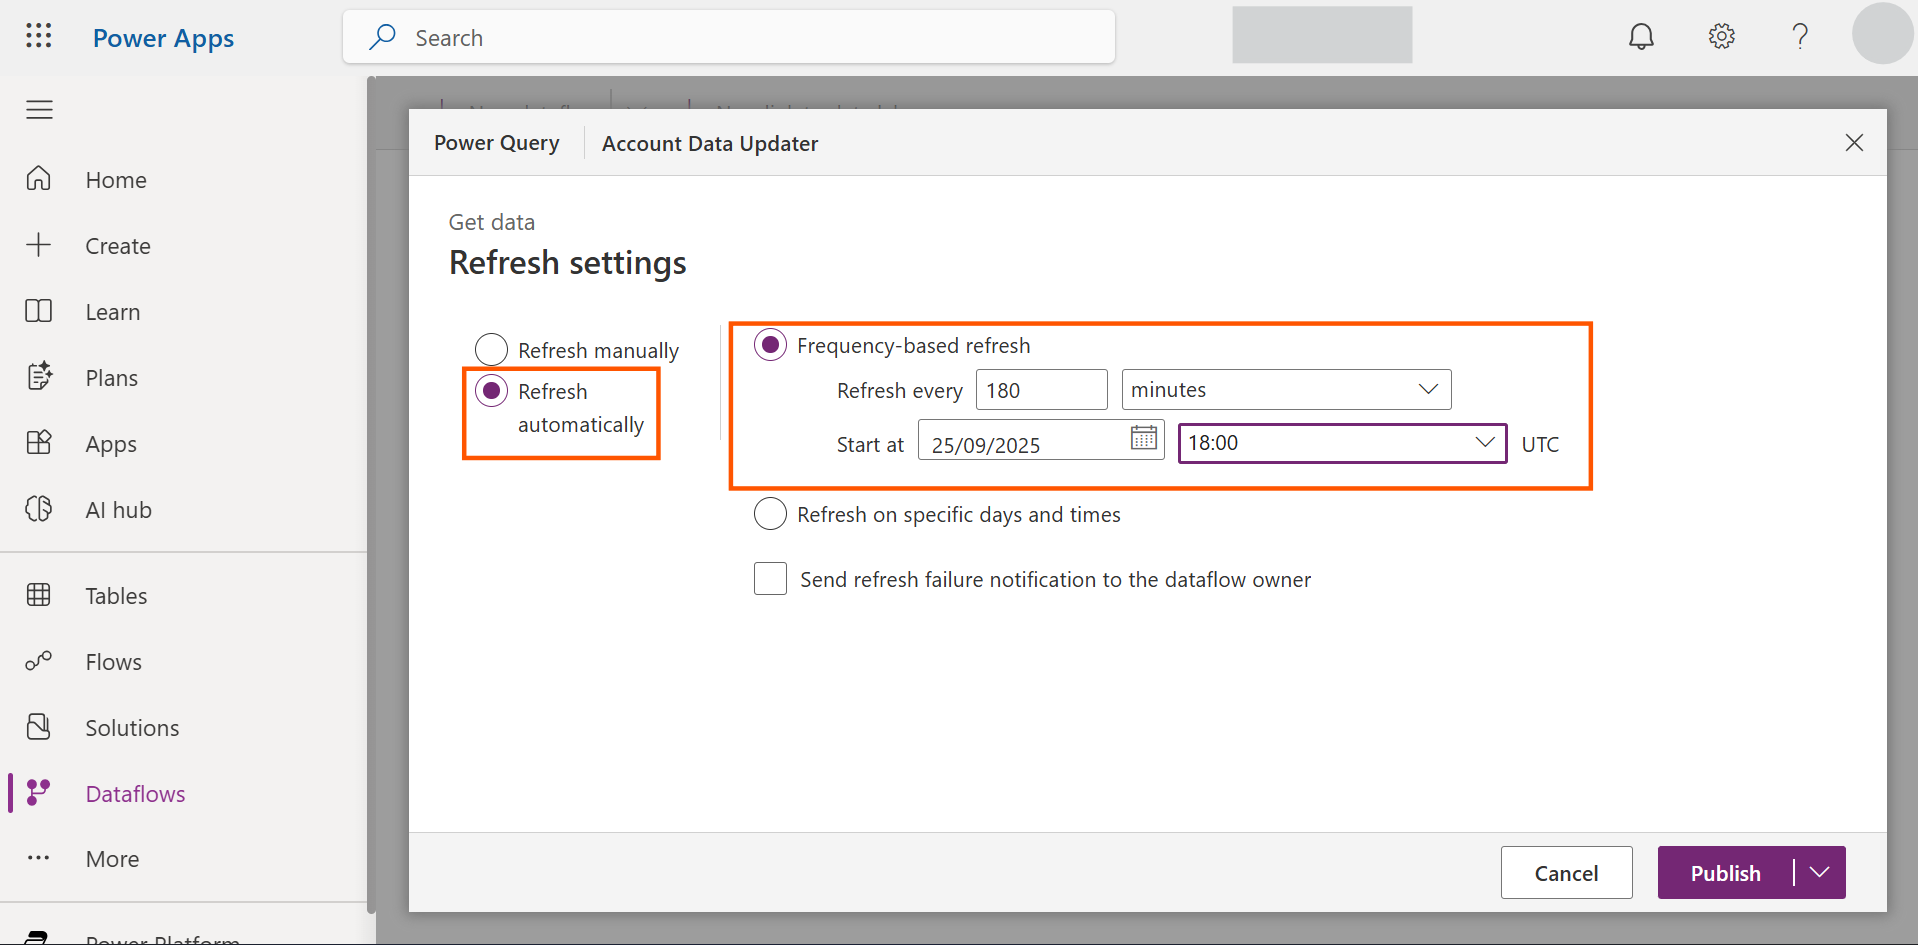
Here, as I want the dataflow to run automatically, I will go with “Refresh automatically”. Also give all the data as per your wish. Note that, even if you give the time to start the run by today or tomorrow, it will run once immediately after you publish. Now you can click “Publish”.
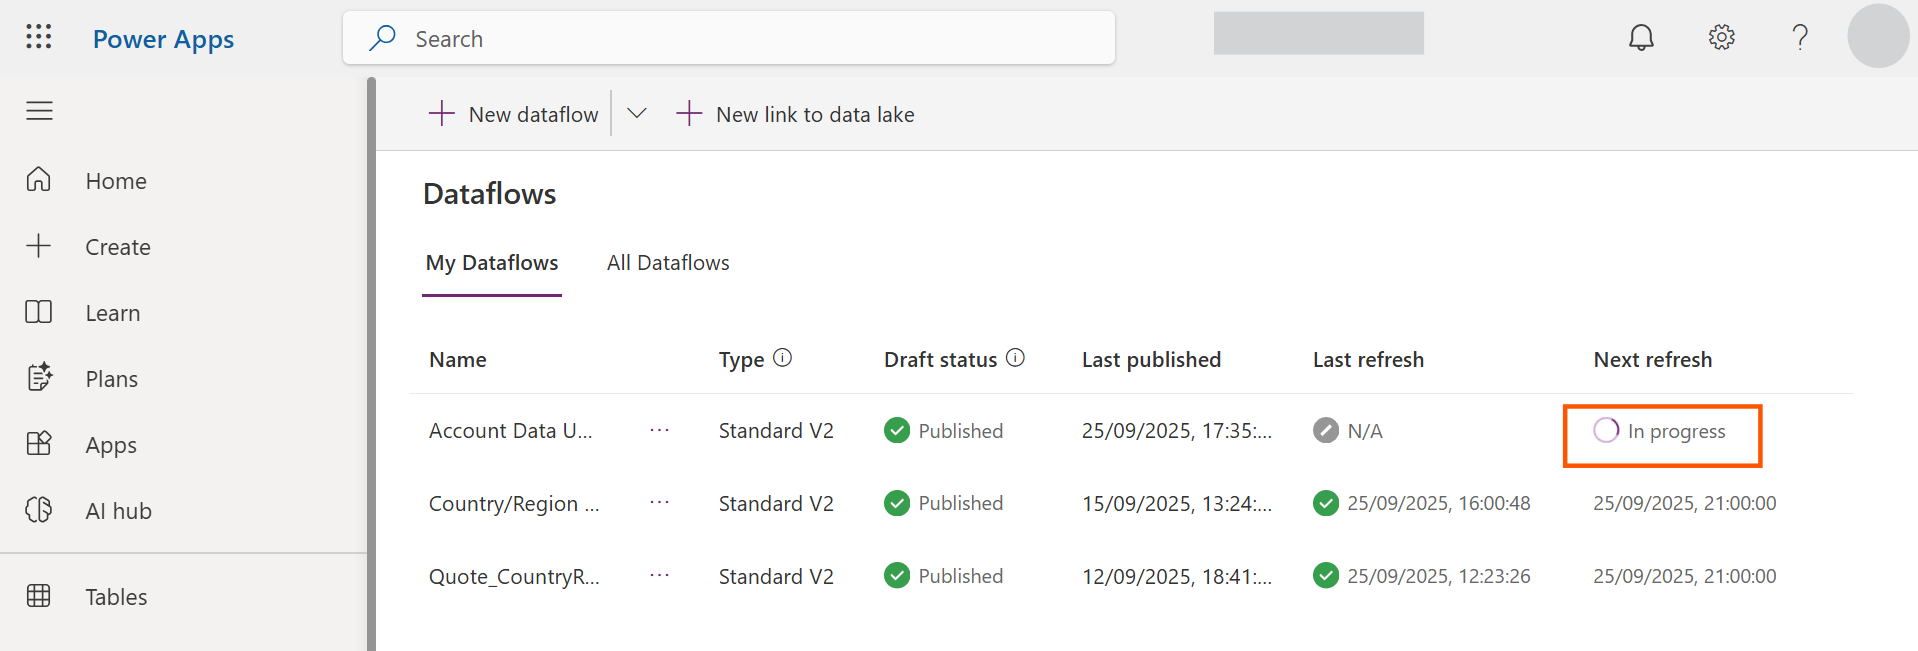
14.Once you publish it, you will see “In Progress” under “Next Refresh”, which means the dataflow is running.
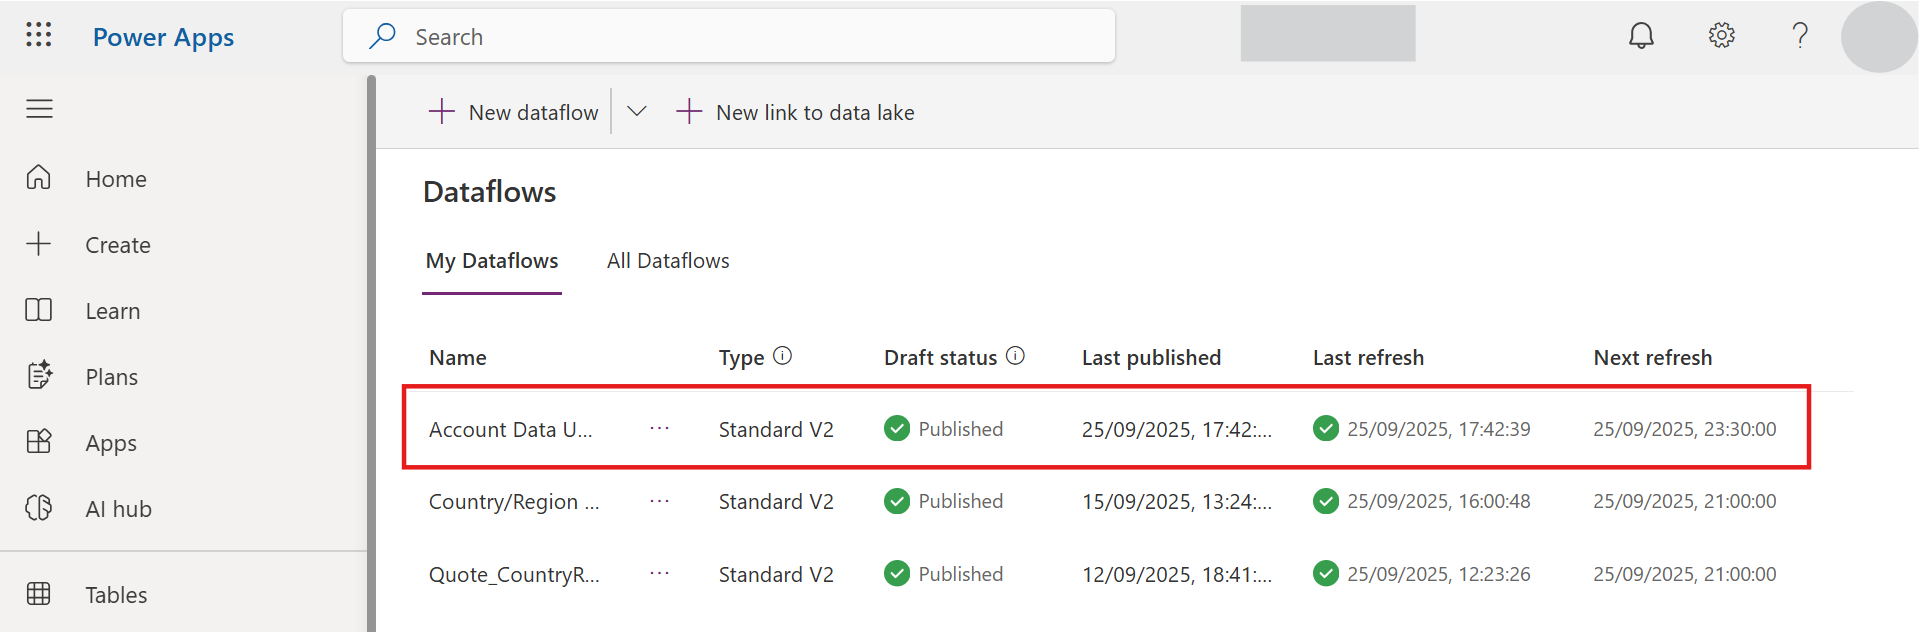
15.Once, flow completes its first execution you will see UI like below.
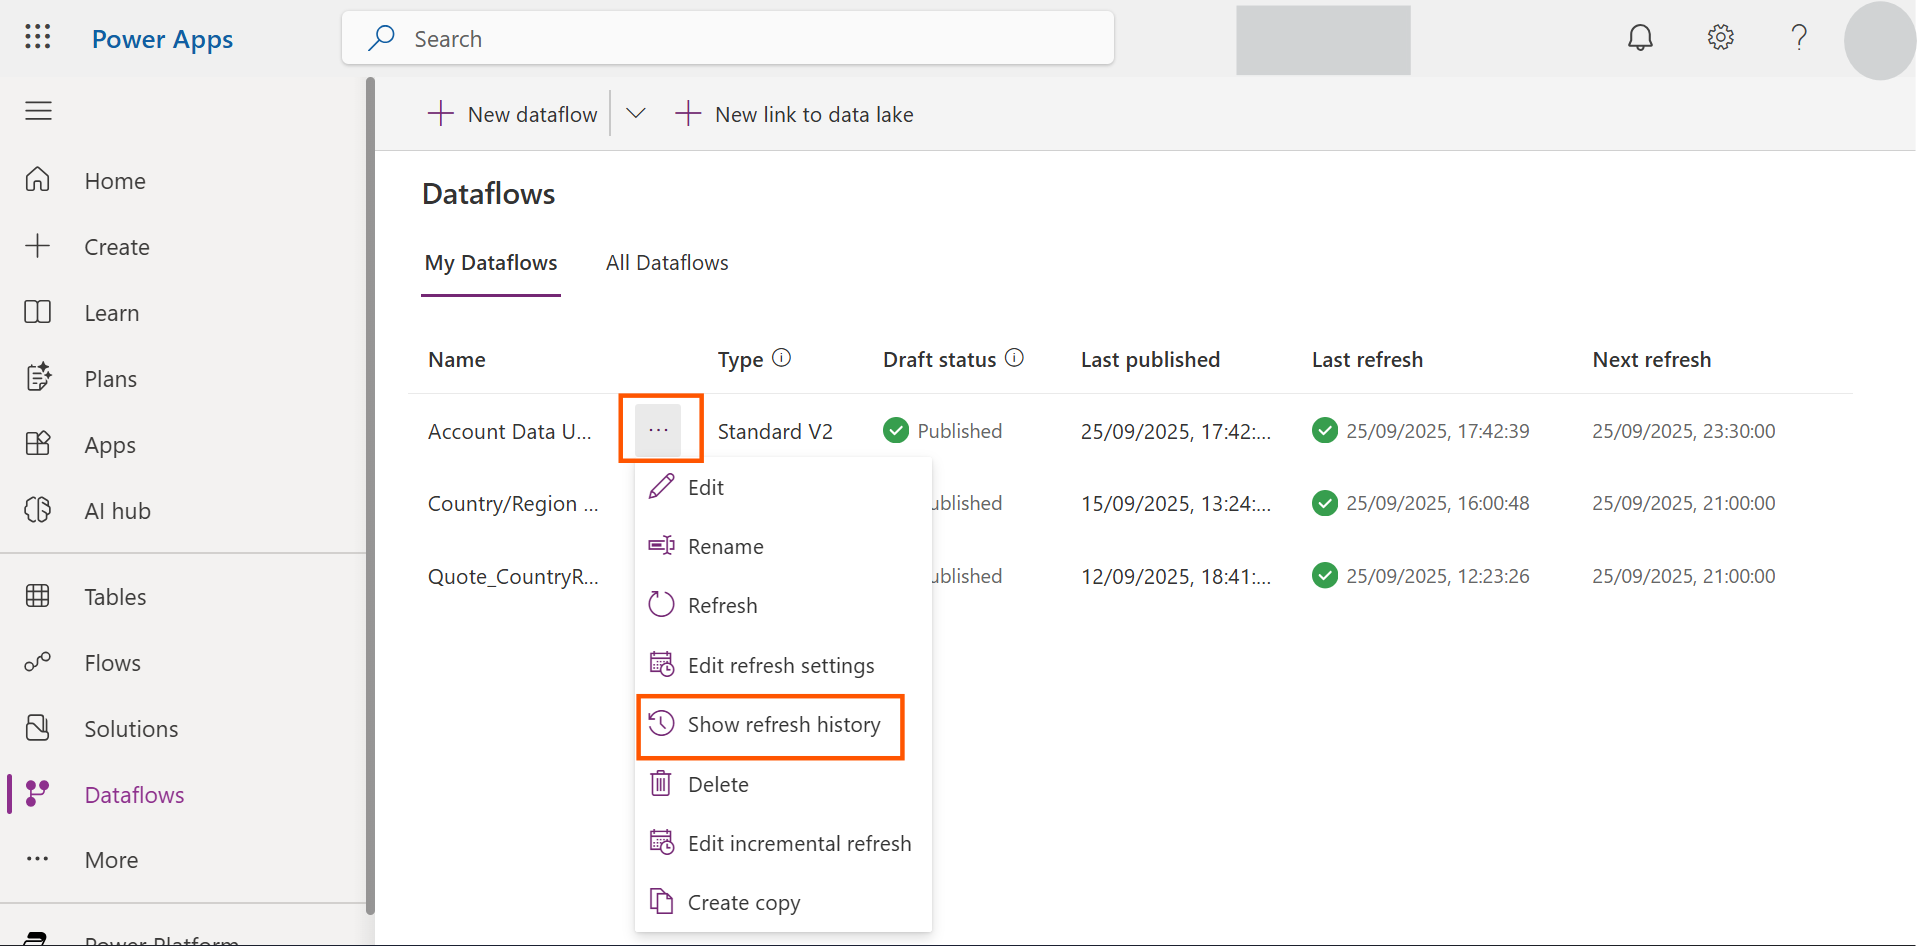
You can also check it’s running history. To do so, click on the 3 dots, and click “Show refresh history”.
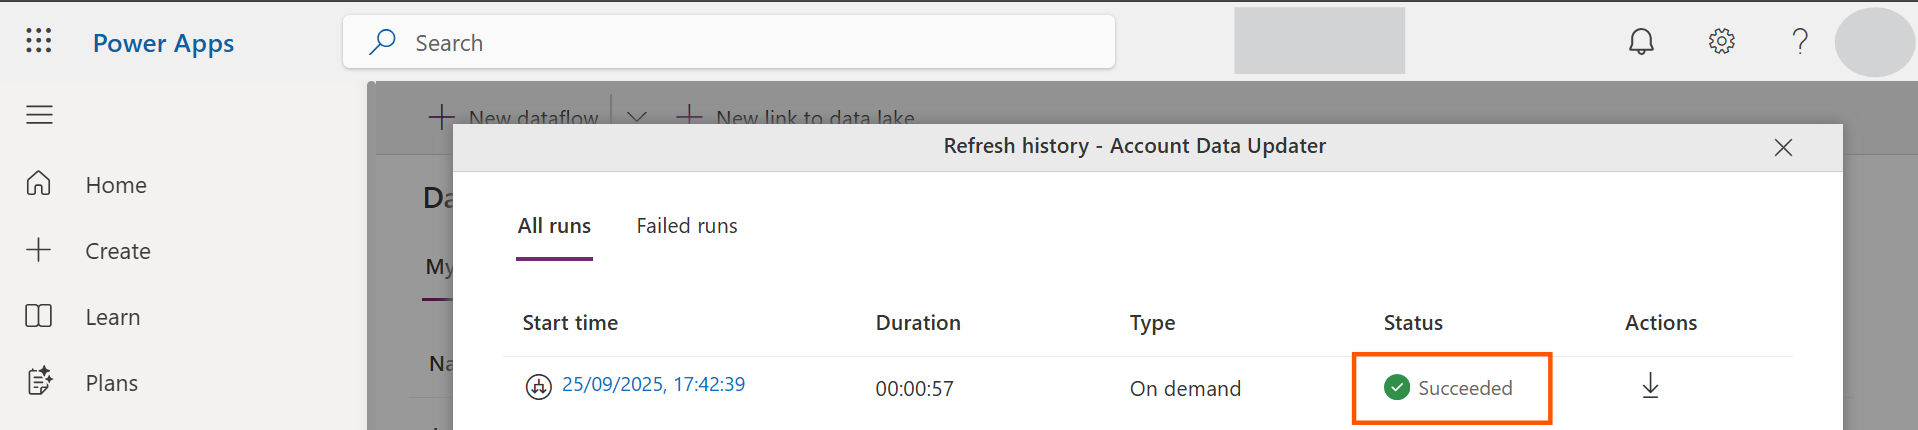
You will see only one status as “Succeeded”, if you have no errors while flowing the data.
Finally, you are ready to check if you get data in the Dataverse after the Dataflow by Navigating to your table in Dataverse. Thank You!!!